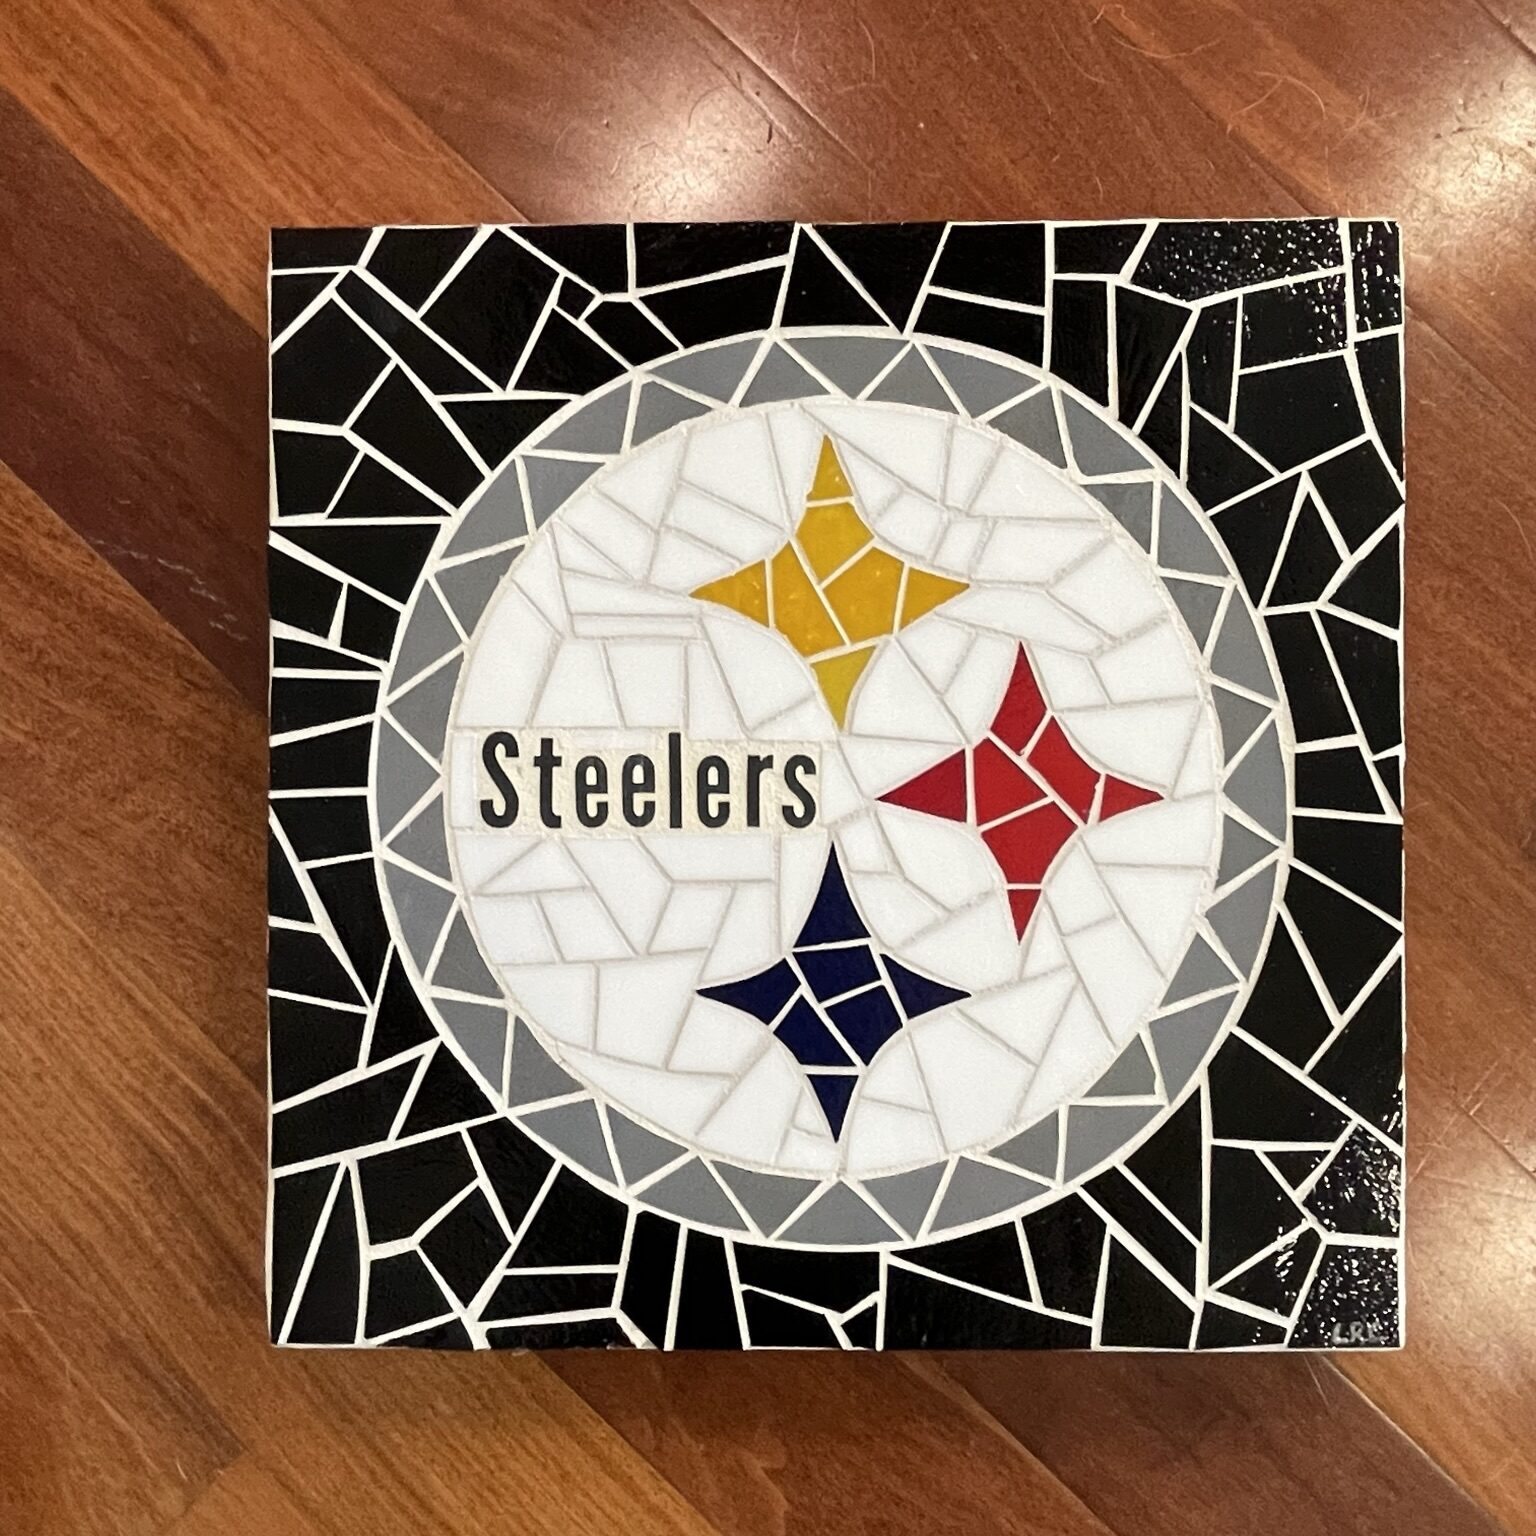
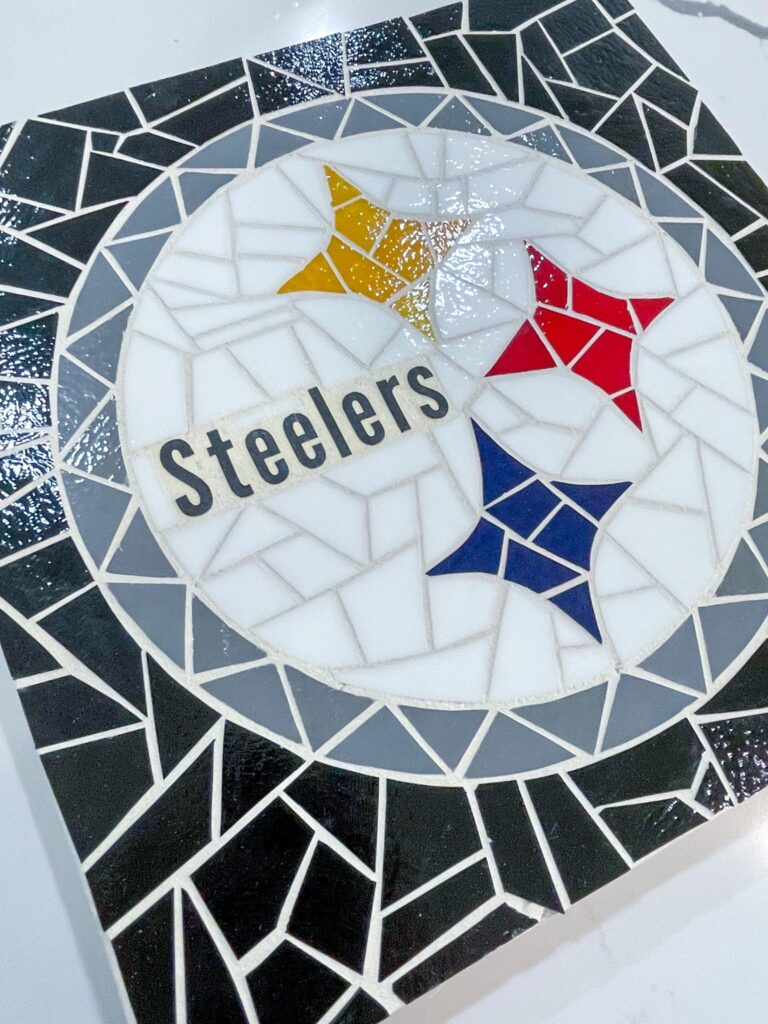
Being the big Pittsburgh Steelers fan that I am, it will be only right for me to make a stained glass mosaic of my favorite team. Read along as I teach you how you can also make this incredible piece of art.
Materials

Here’s what you will need in order to make the Steelers Stained Glass Mosaic:
- Wooden Board – mine was 12″ by 12″
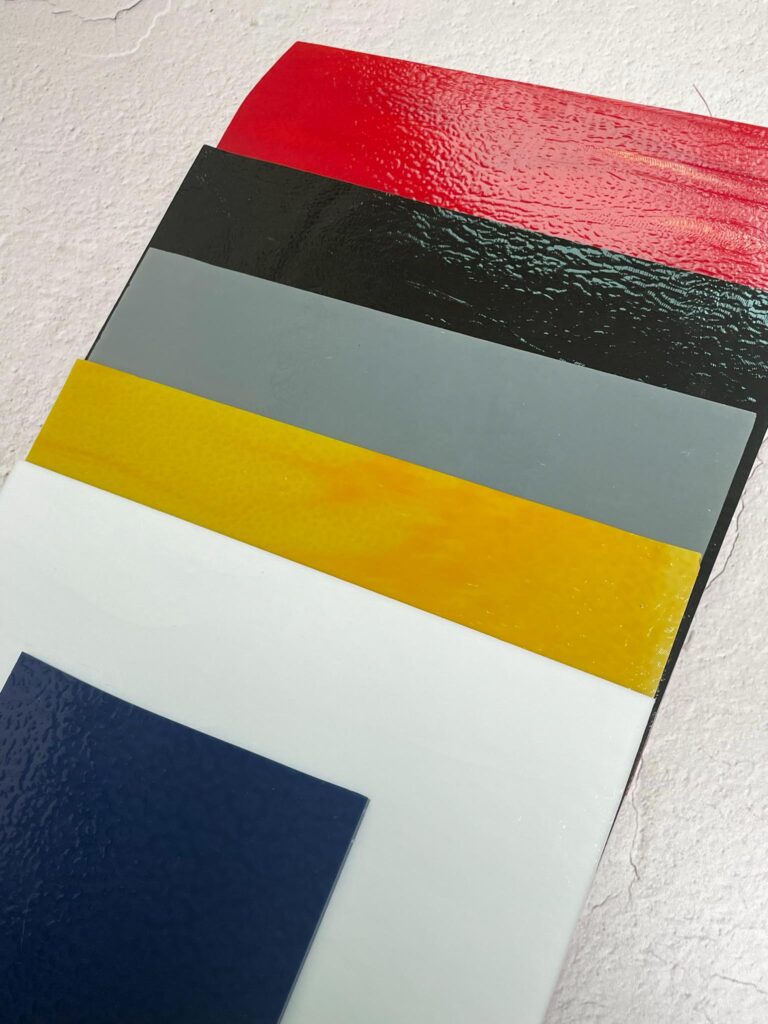
- Stained Glass – Black, Gray, White, Yellow, Blue, and Red
- I used stained glass made by Bullseye.
- Wooden Letter Cut Outs
- I ordered 1 inch letters that were lasered cut out from Woodland Manufacturing.
- Black Paint
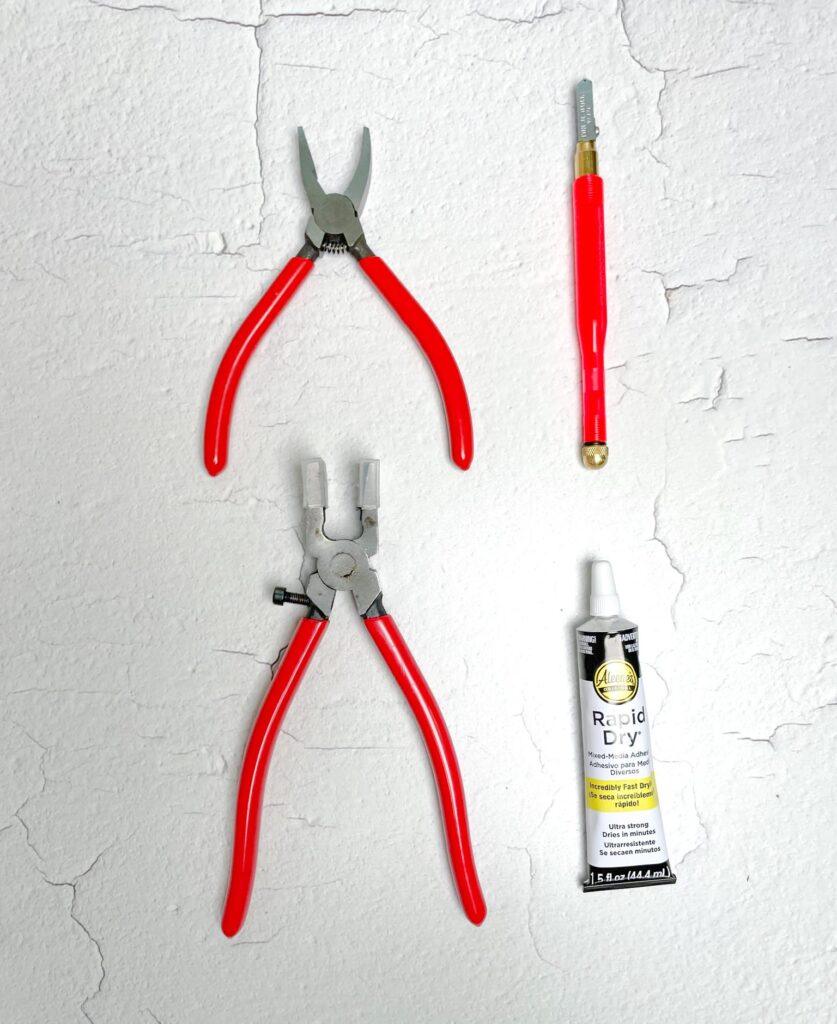
- Running Pliers, Breaking Pliers, Pencil Style Glass Cutter
- You can purchase all these tools from Amazon here.
- Glue
- I recommend Weldbond. My local craft store didn’t have it, so I purchased another brand.
- White and Gray Grout
- I recommend sanded grout from Home Depot. Delorean Gray and Snow White were the shades used for this project.
- Tracing Paper (Optional)
- Stencil (Optional)
- A stencil can be used to trace your art on the wooden board.
Tracing the Pittsburgh Steelers Logo
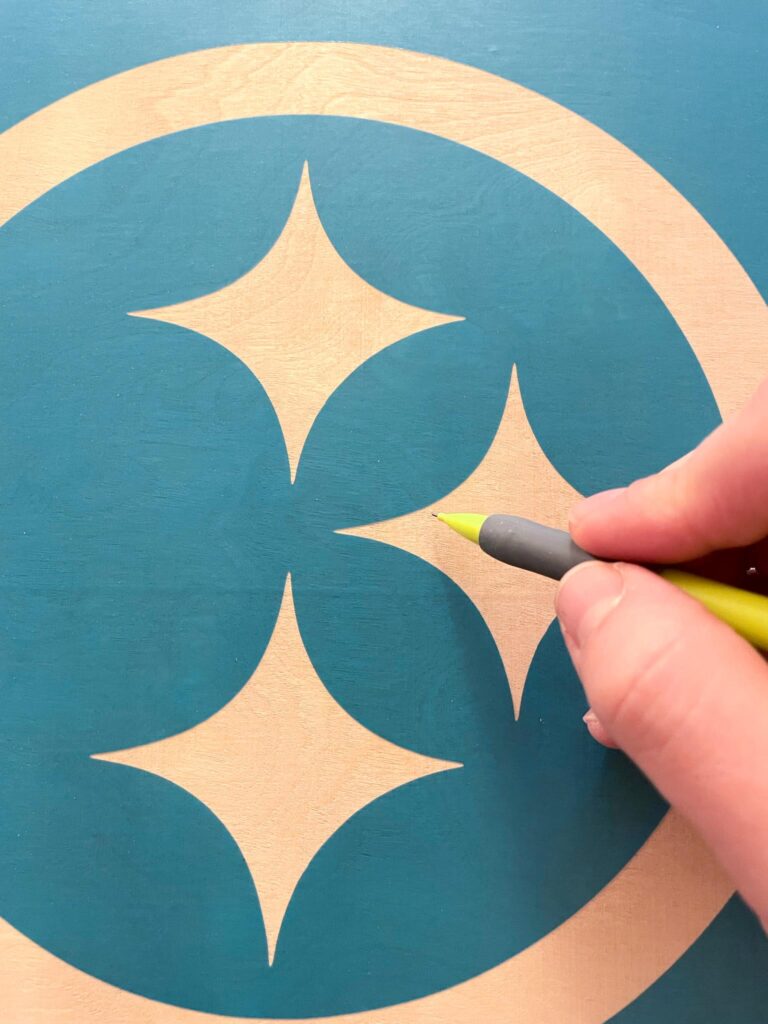
I used my electronic cutting machine to cut out the Steelers’ logo. After sticking the cut out vinyl on the board, I traced the logo onto the wood.
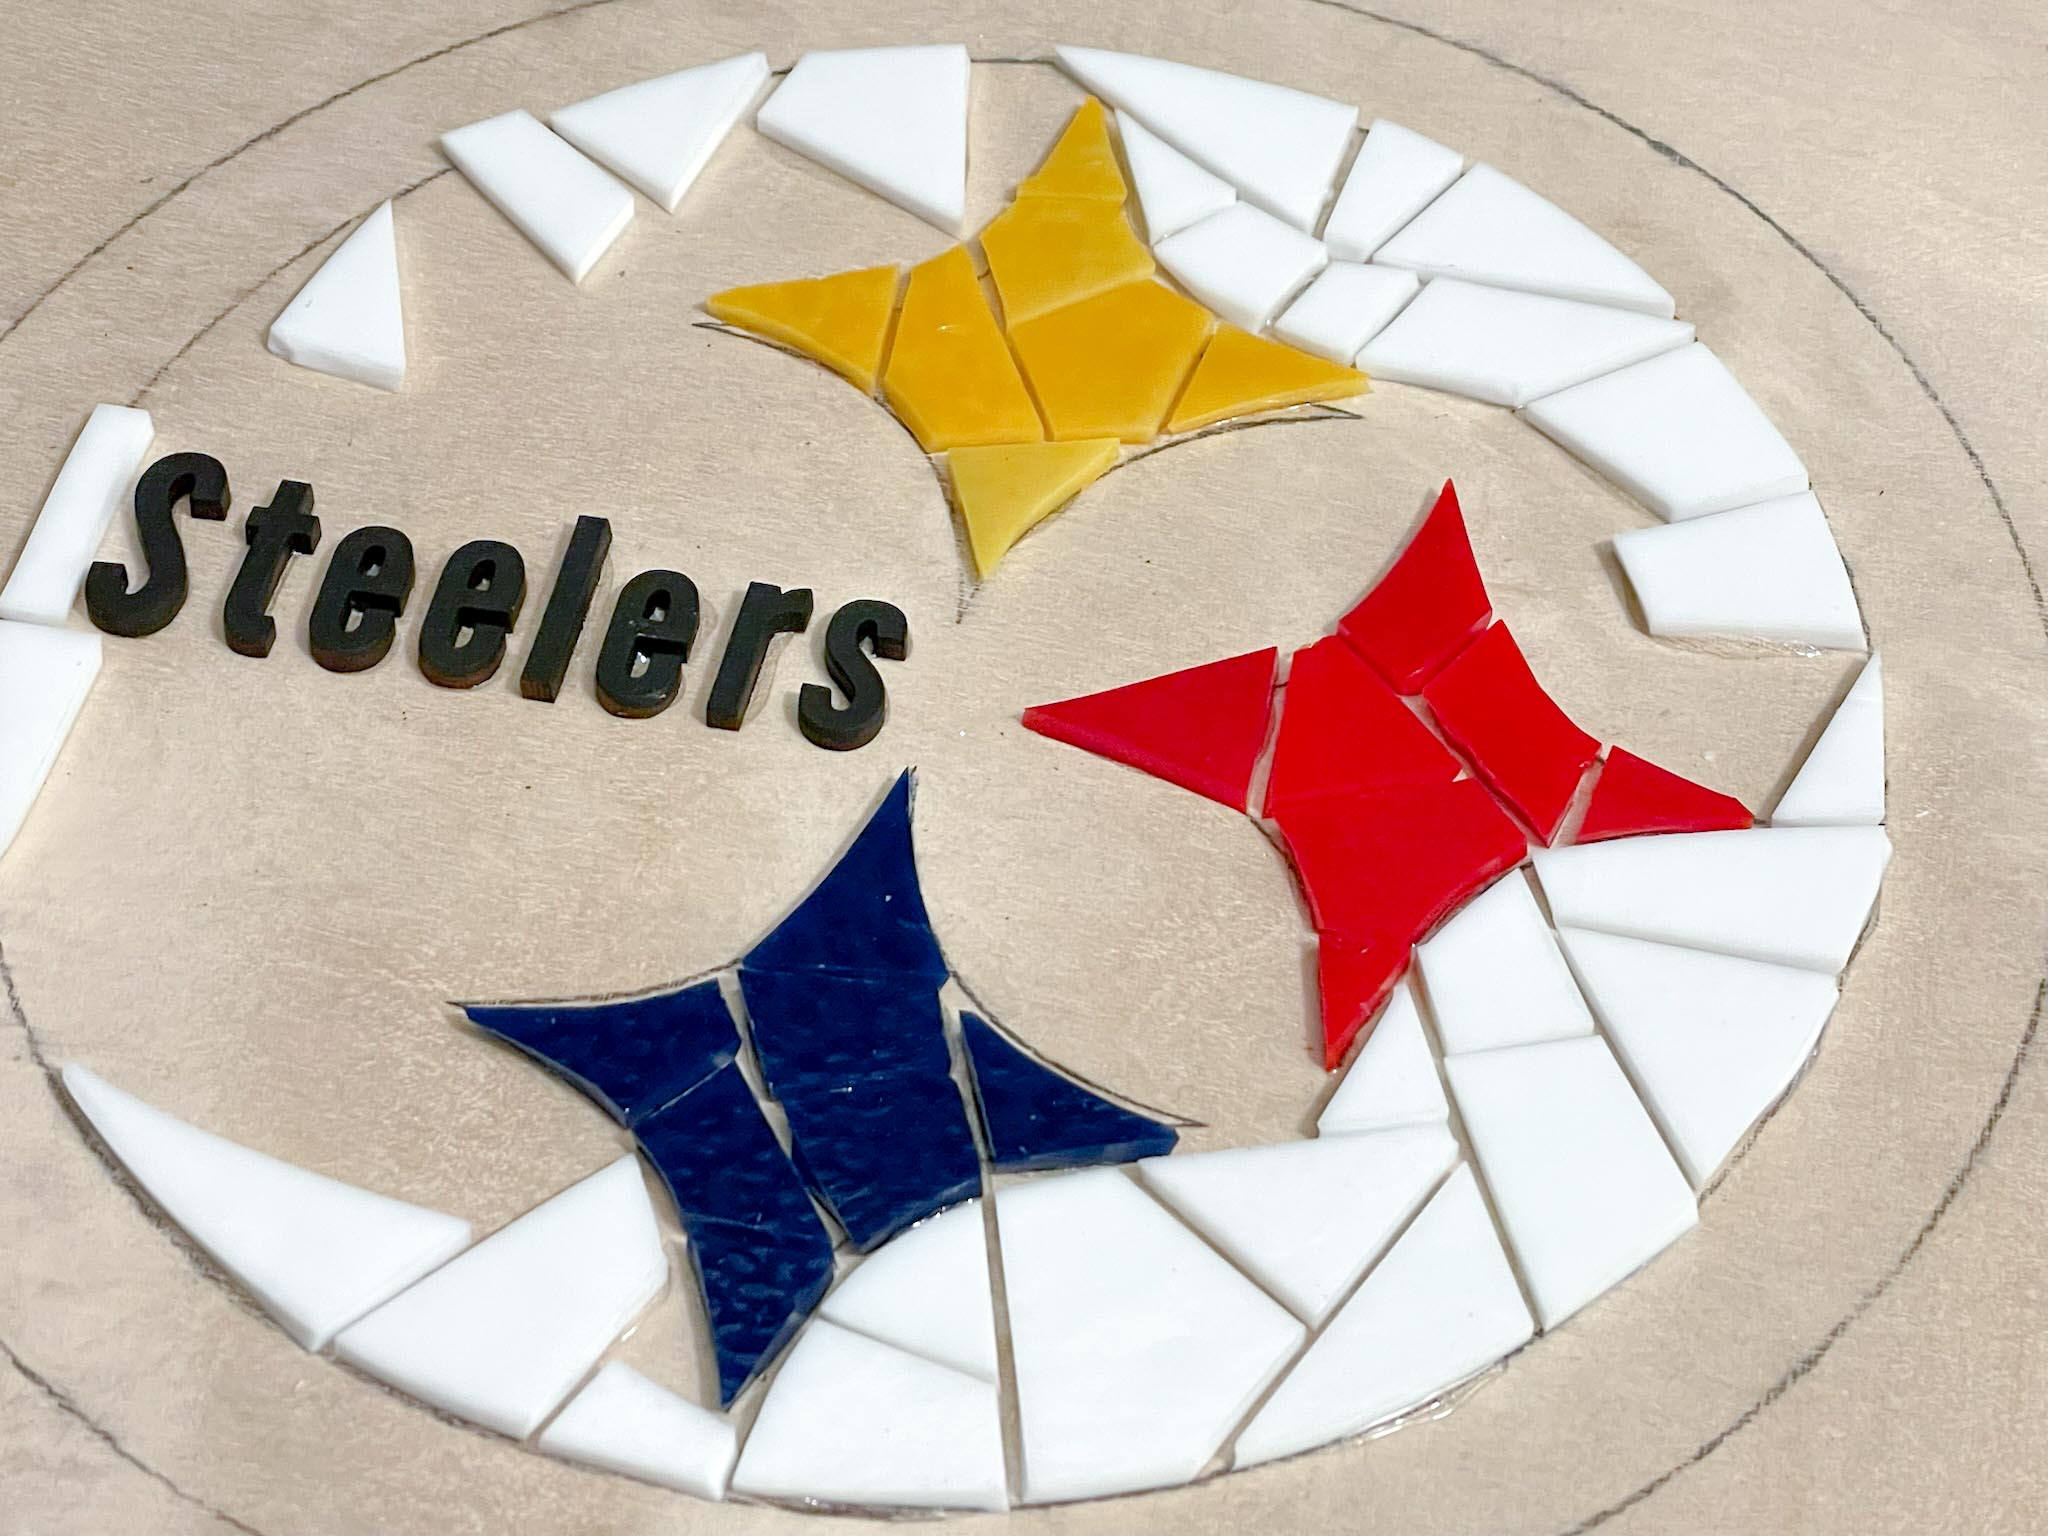
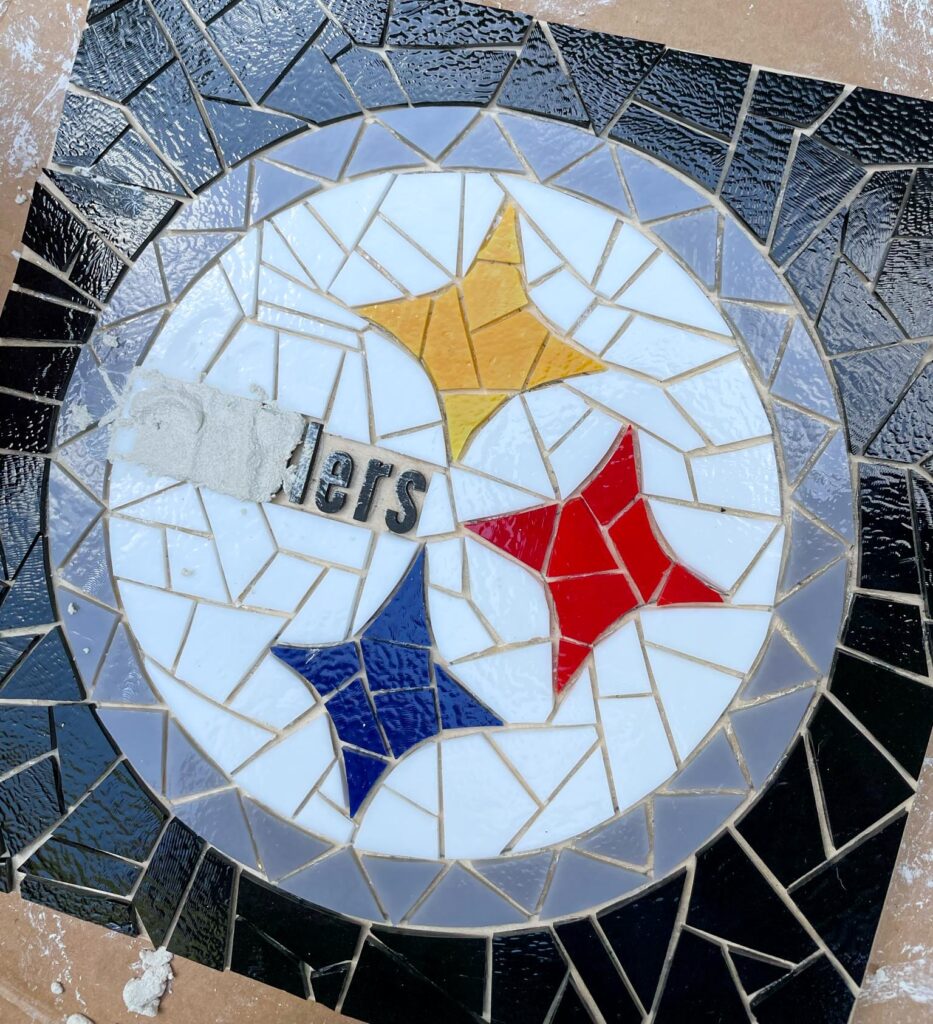
S-T-E-E-L-E-R-S Laser Cut Letters
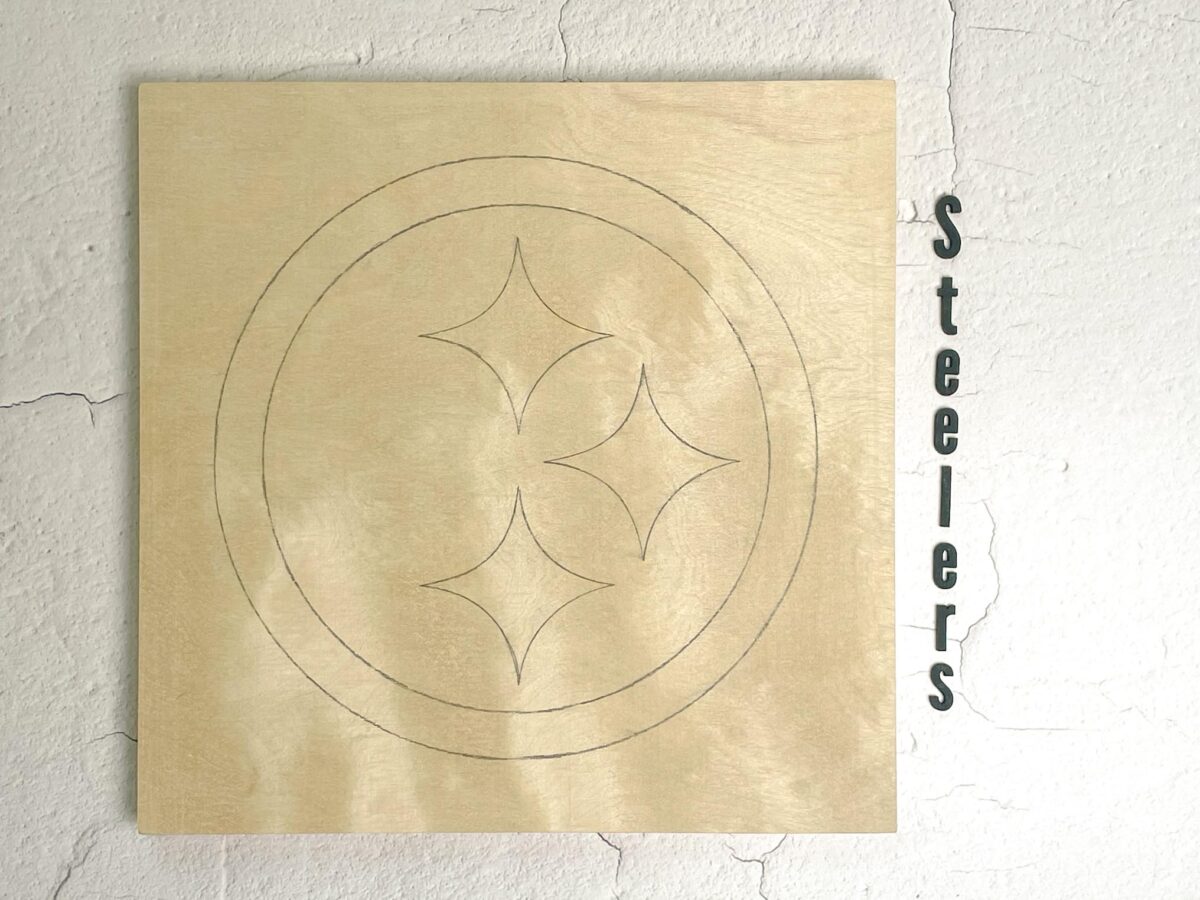
Take your 1 inch laser cut letters and paint them all black.
Glue them on the left side of the circle, inside the logo.
How to Cut Stained Glass
Click here to read our entire detailed article on how to cut glass. It includes lots of quick gif video clips showing you how to cut the glass to the desired shape and size.
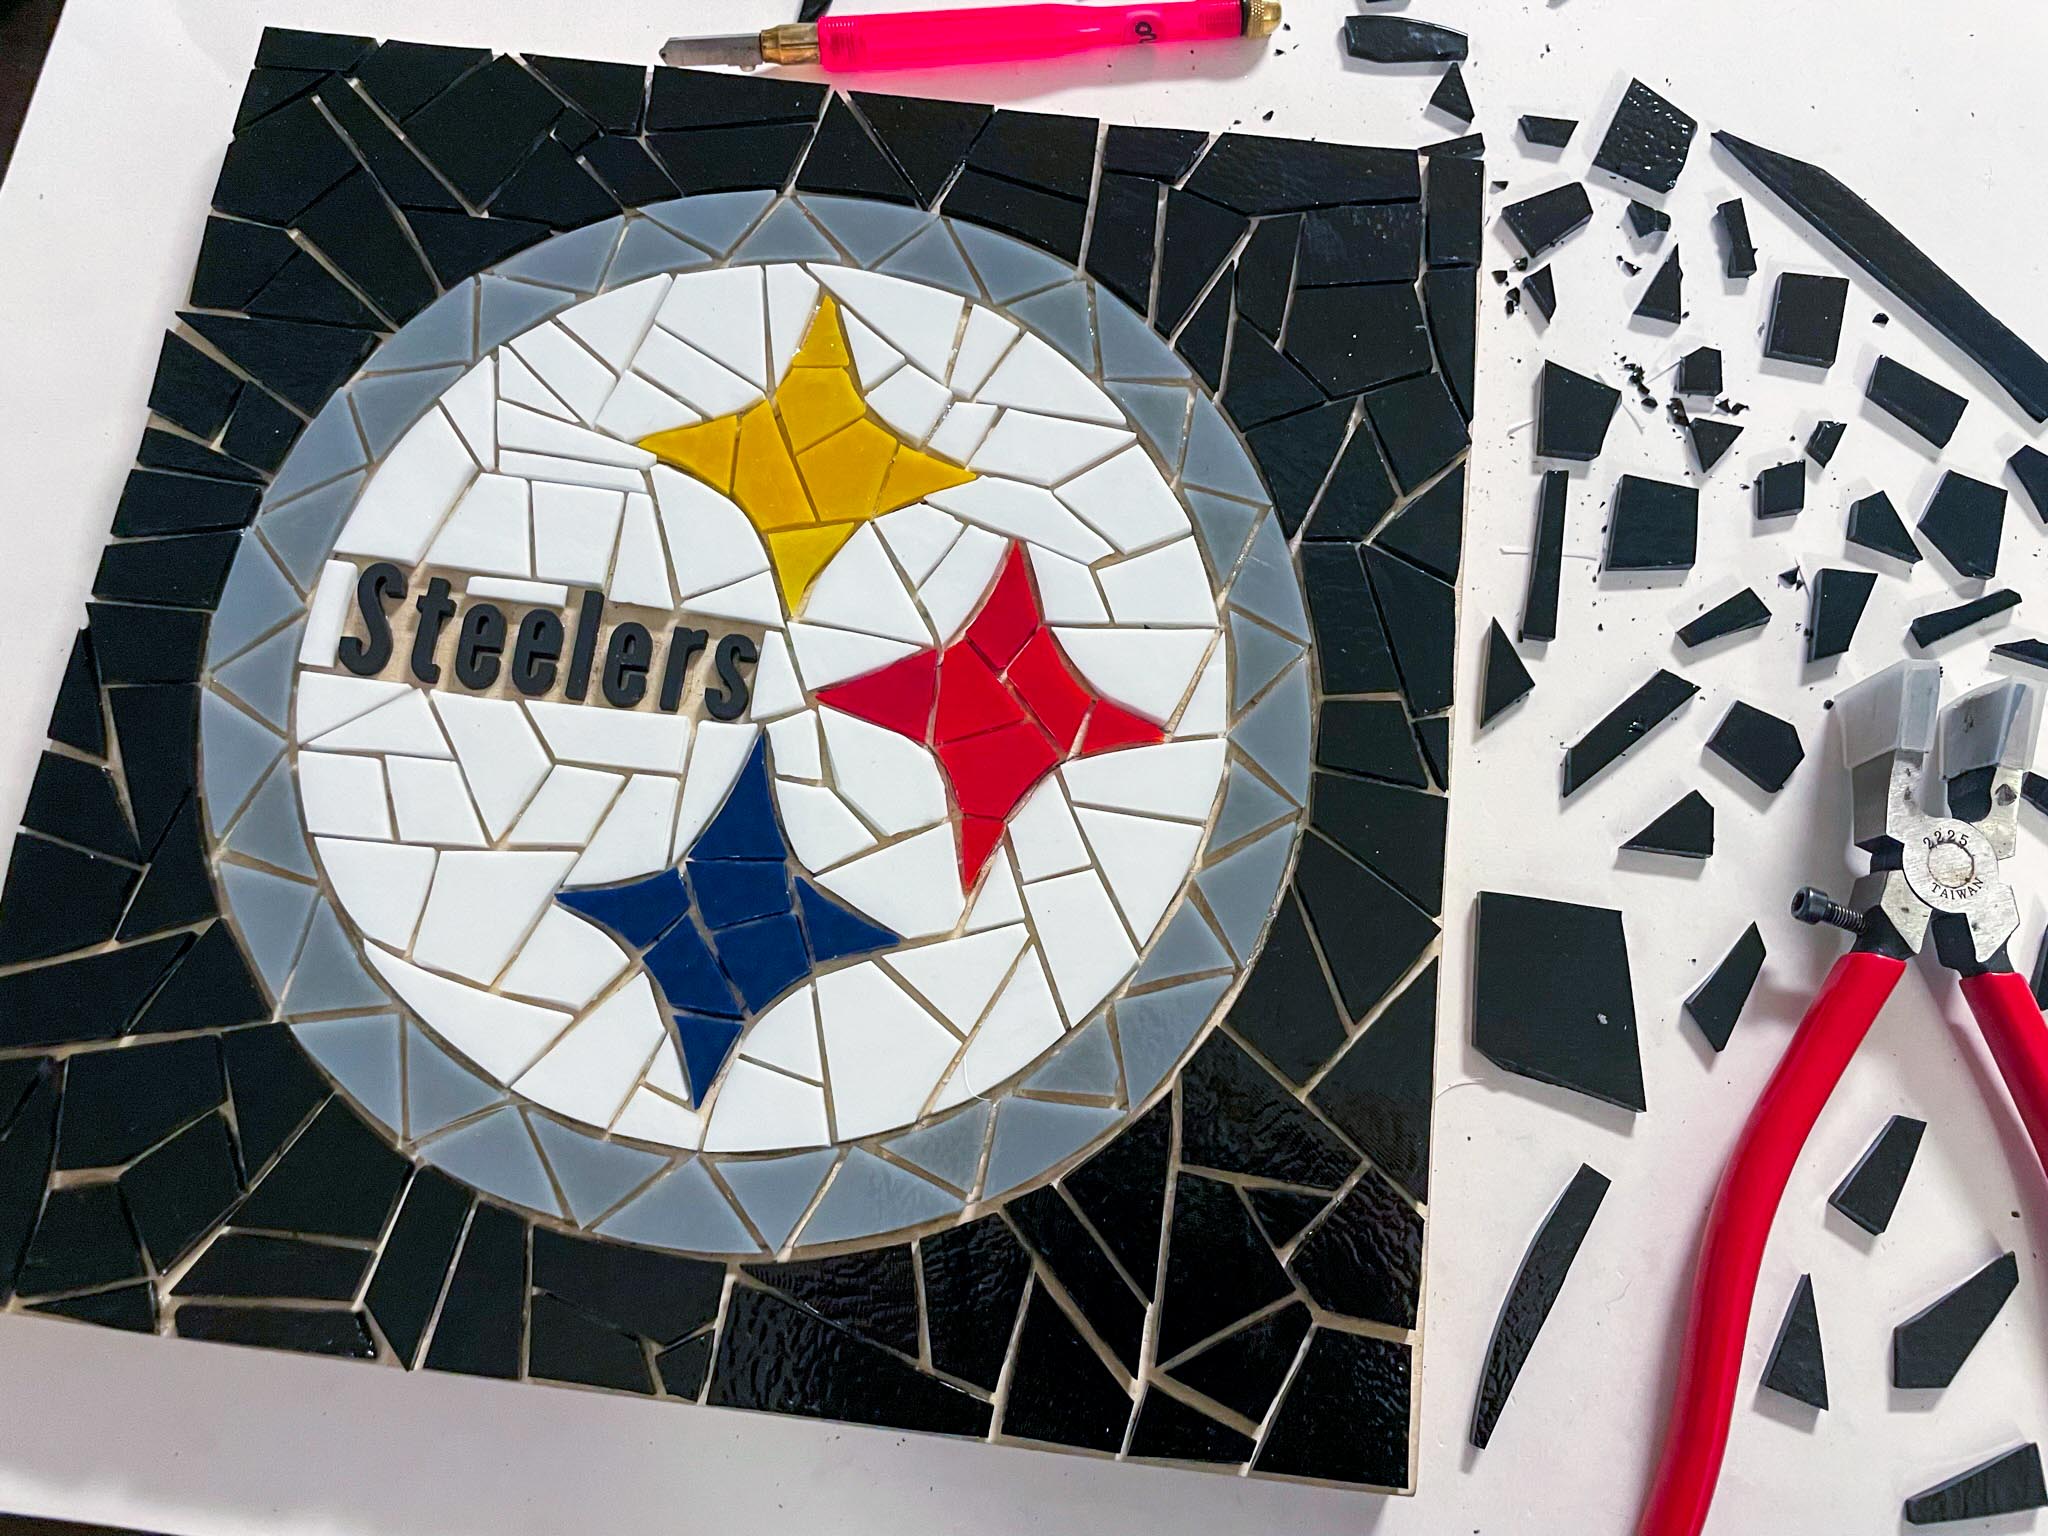
Creating the Pittsburgh Steelers Logo out of Stained Glass
Keep in mind, we are all artistic in our own way. That’s what makes everyone’s art so interesting and fun. I personally like to make my pieces more exact with more preplanning. Some people like to work in a more free flow manner. Do what makes you have the most fun! Below I’ll be describing how I created my piece.
My tip is to start with the smaller details in the middle and to work my way out, finishing with the background last. But there is no right or wrong way to start!
Last tip, you don’t want the glass pieces to touch one another. Think of every piece of glass on an island.
Red, Blue, and Yellow Stars
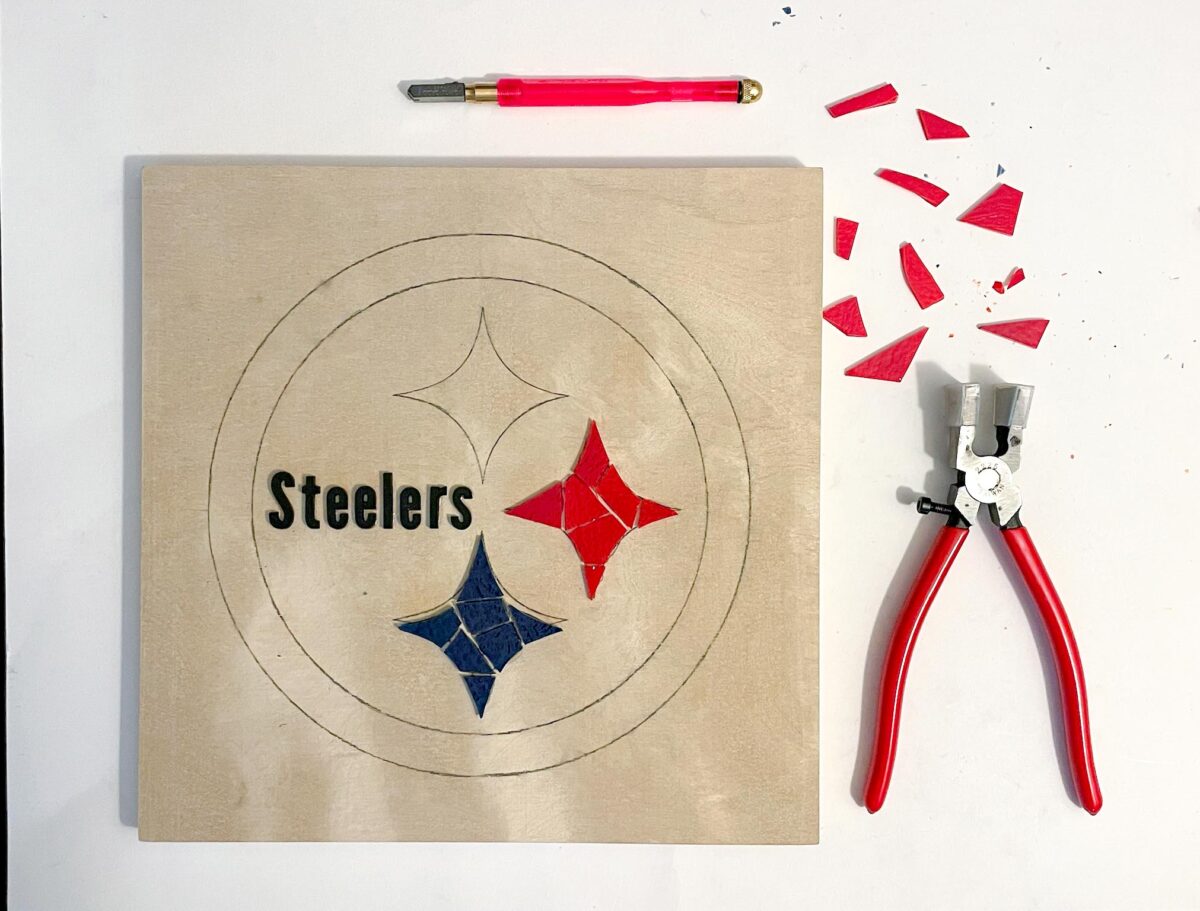
Begin with the three stars. Using tracing paper, traced out each of the three stars and cut them out of the paper.
Then draw thick lines inside each of the stars. The lines are where you want to cut the glass and the shapes you want inside the stars. With scissors, cut along the thick drawn lines. Each star will now have several oddly shaped cut outs.
Place all the small oddly shaped cut outs on the glass. Then score the glass along the outline of the cut outs. After scoring and snapping the glass with the pliers, your desired pieces are created!
Fit your newly cut glass pieces inside the traced stars on the wooden board, like a puzzle. Make sure the pieces are not touching one another.
When the pieces are laid down at a desired spot, glue them.
White Circle
Cut the white glass in any shape in want. Glue the pieces down and make sure they are not touching other glass.
Place the white glass around the words “Steelers” and not inside it.
Gray Circle
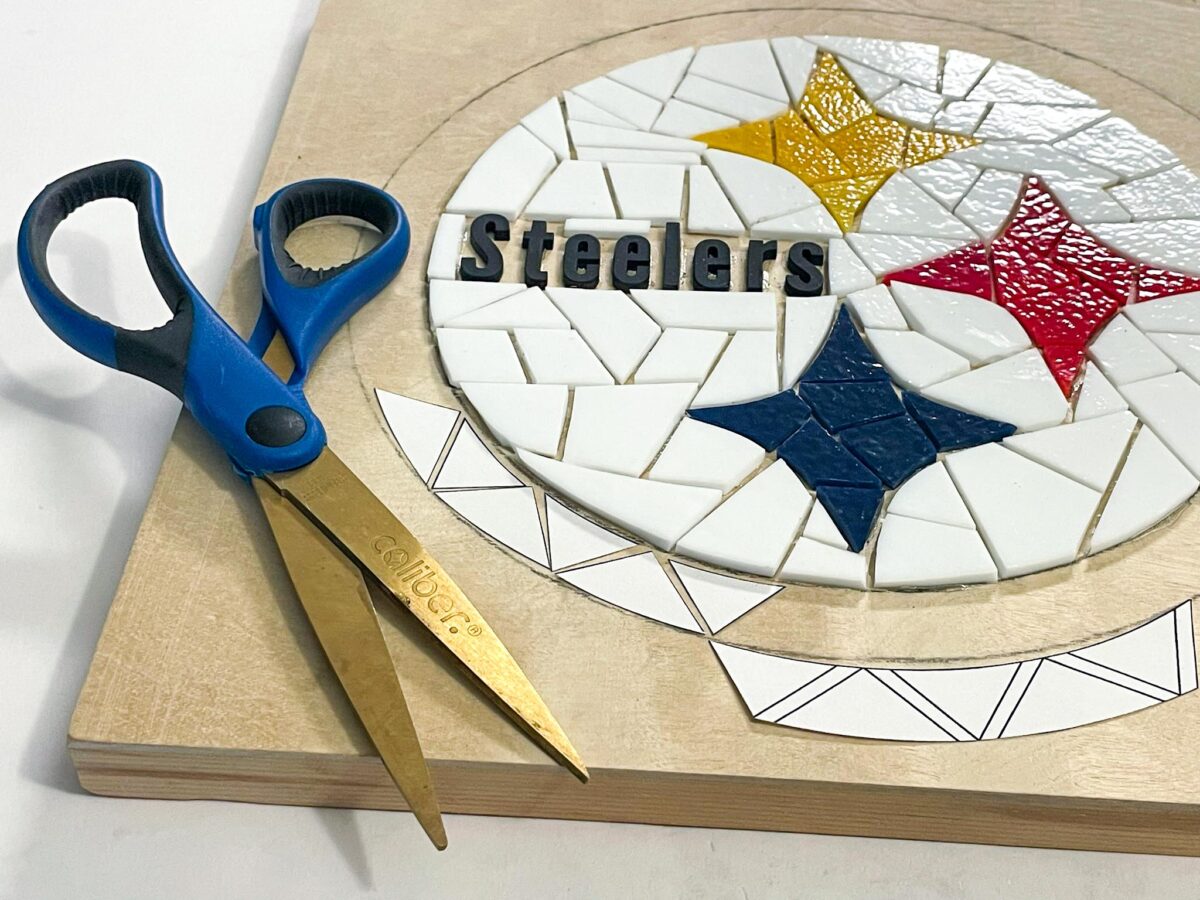
Stylistically, I decided to cut triangles for this section. Using any paper (tracing or regular) cut some triangles and see how they fit. When you find the right fitting triangle cut outs, make those same pieces with the gray glass. Then glue the glass down.
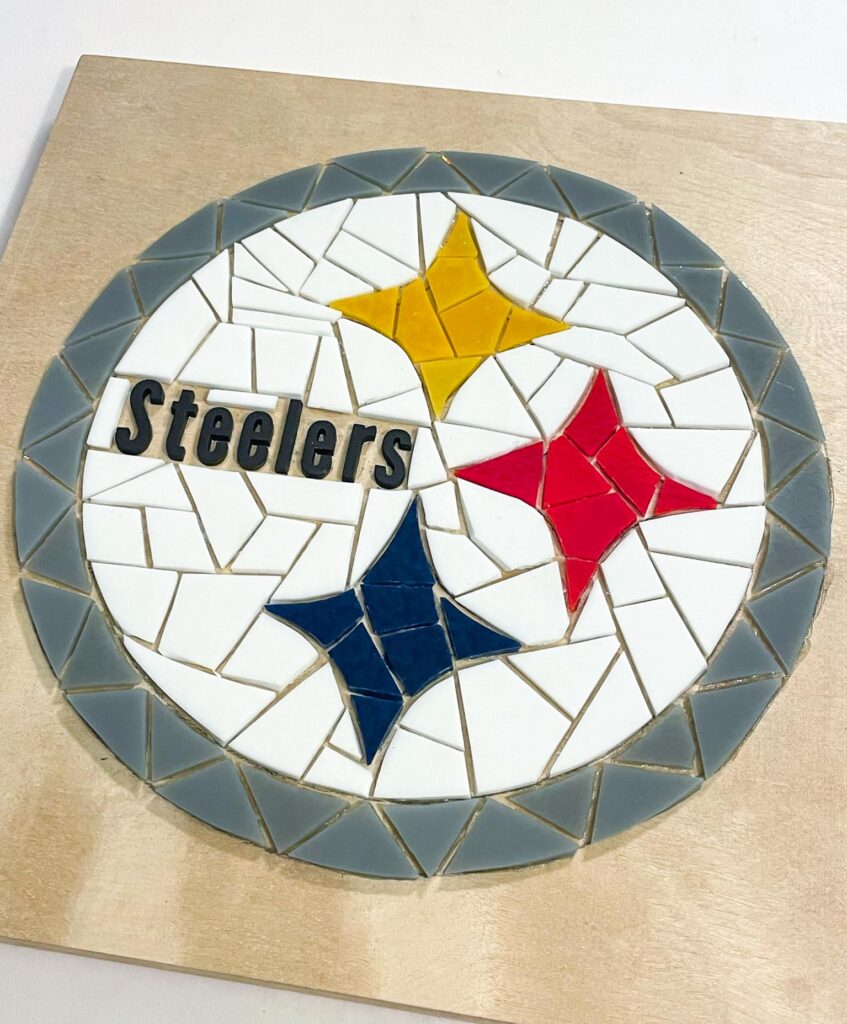
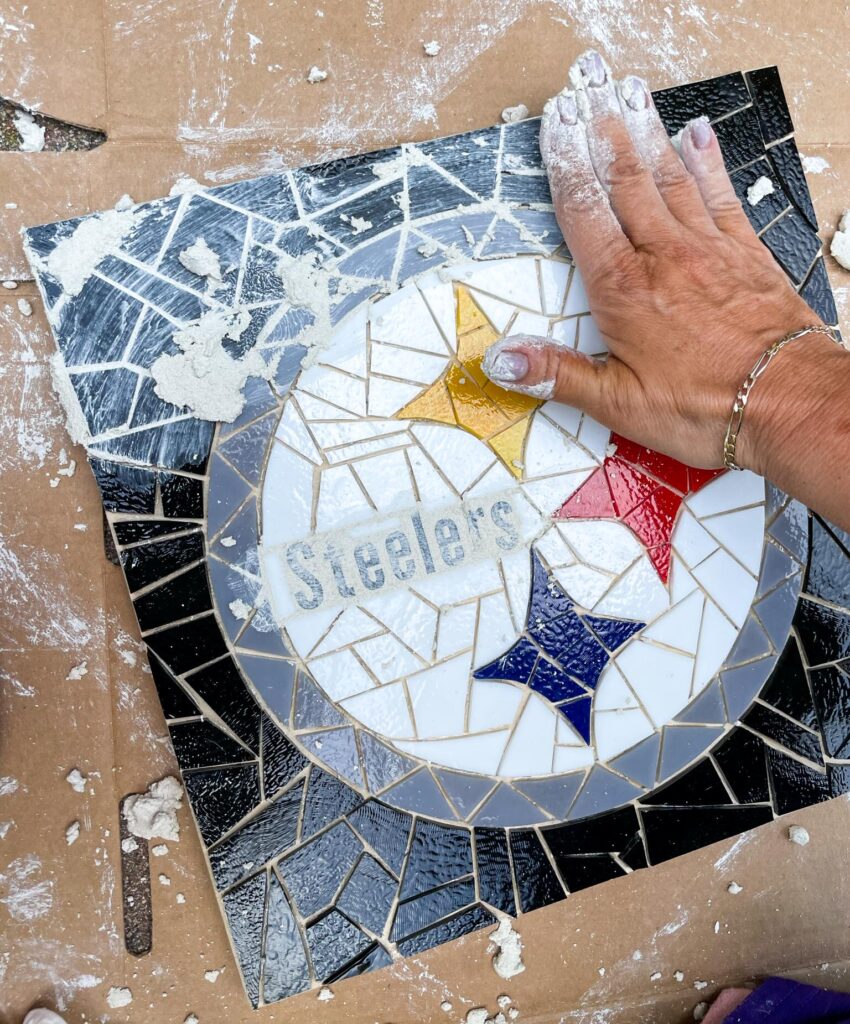
Black Background
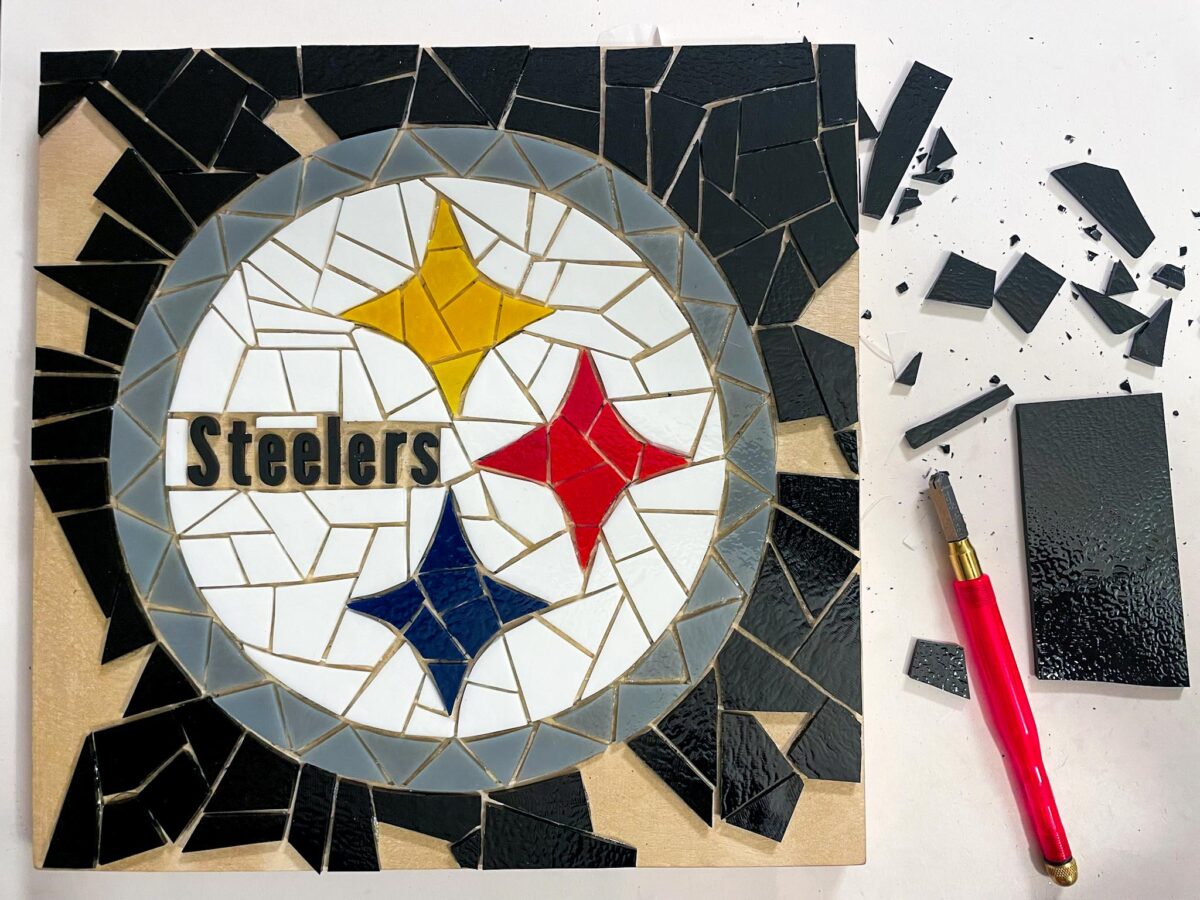

This is not necessary, but I generally try to make my background glass pieces larger than the center or detailed pieces. Your piece to be easier to look at from afar and allows you to finish your project quicker since you will be working with less pieces.
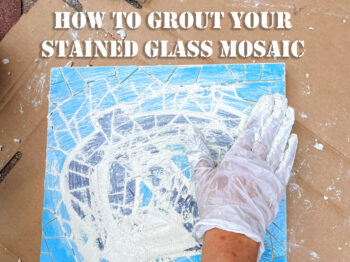
Grouting
Click here to read my detailed article on how to grout your stained glass mosaic.
But here I’ll describe quickly how to grout the Steelers mosaic.
You will want to make two different grout colors, Delorean Gray and Snow White. Mix each of the grouts with water in a bucket.
Once your grout is wet and ready, cover the Snow White grout over the black glass, gray glass, and the “Steelers” letters. Some of the Snow White grout will seep to the white glass. If that happens, take a small tool or pick to push the grout back or lift it up.
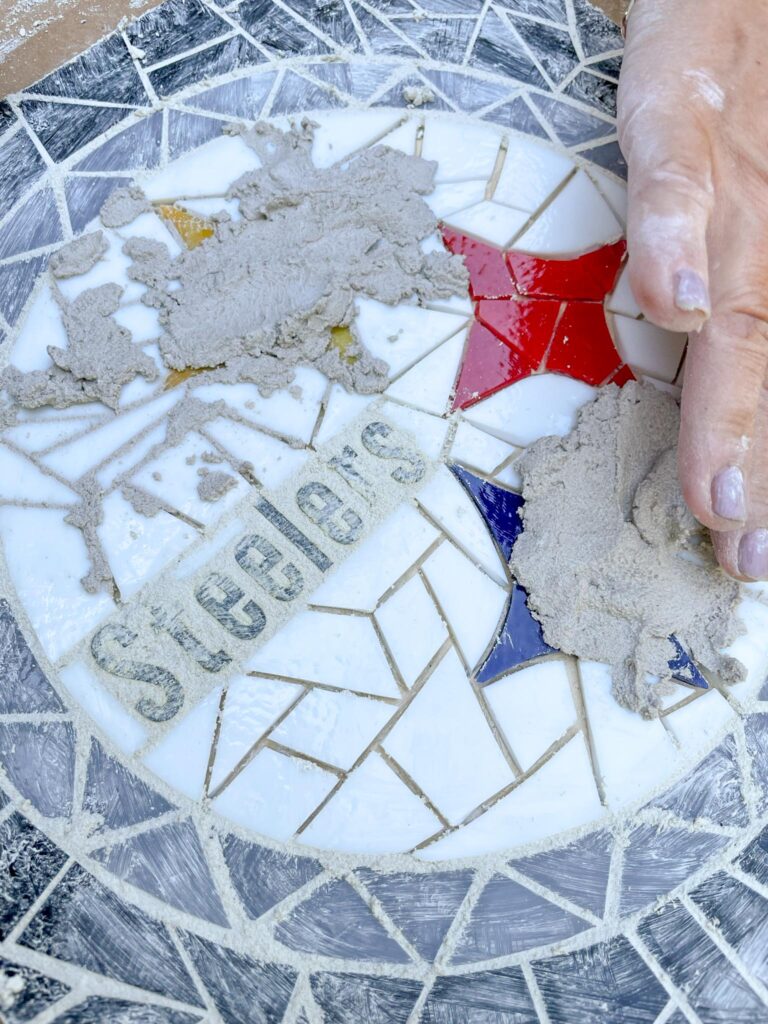
Using the Delorean Gray grout, cover the remaining white glass center of the mosaic. That includes the three stars.
Your mosaic will want to dry for 15-20 minutes. Keep it away from the sun. Take a wet sponge and wipe across the mosaic, removing the left over grout that was drying on top of the glass.
Now your stained glass mosaic is coming to life!
Final Touches
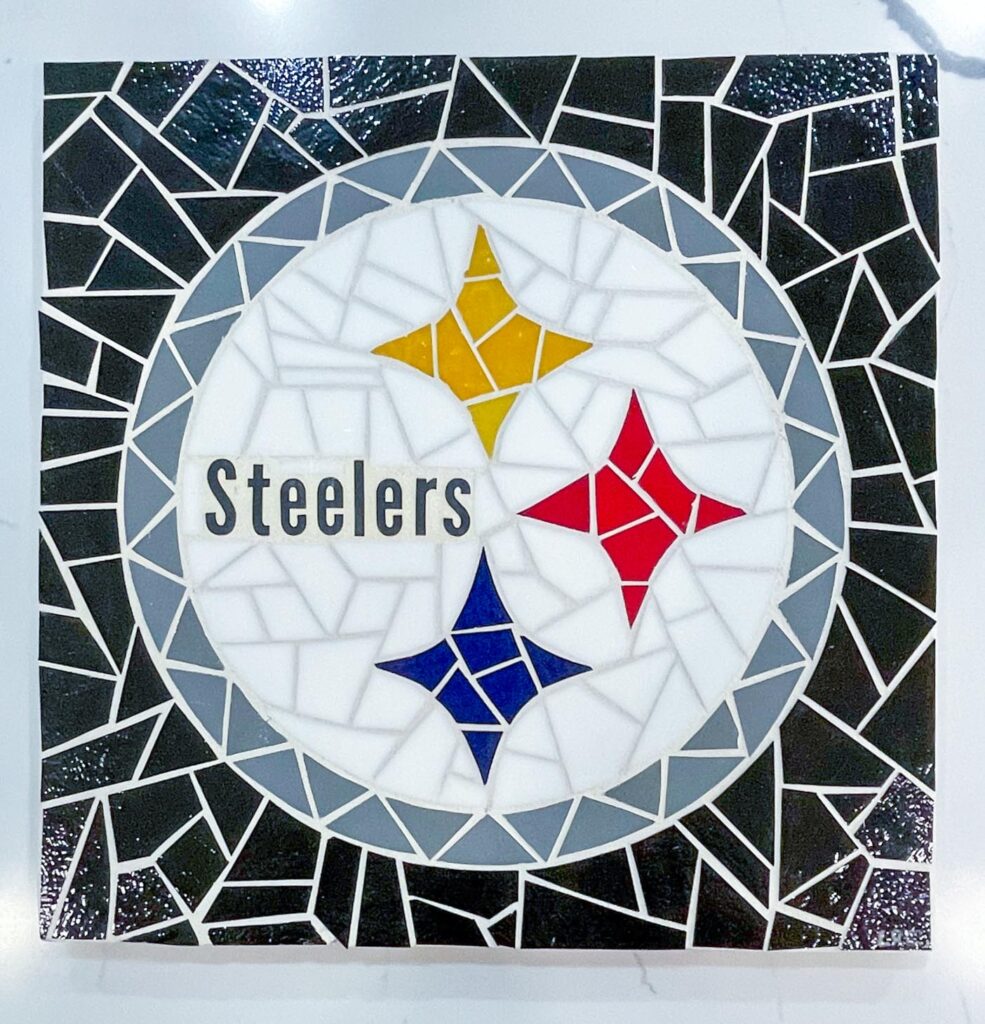
Vinegar is a great way to clean off your mosaic and allow for it to shine! Wipe some vinegar over the glass and it will sparkle.
Get a hanging hook, find your favorite wall space, and hang that masterpiece up. Congratulations on making an incredible, one-of-a-kind piece of art.