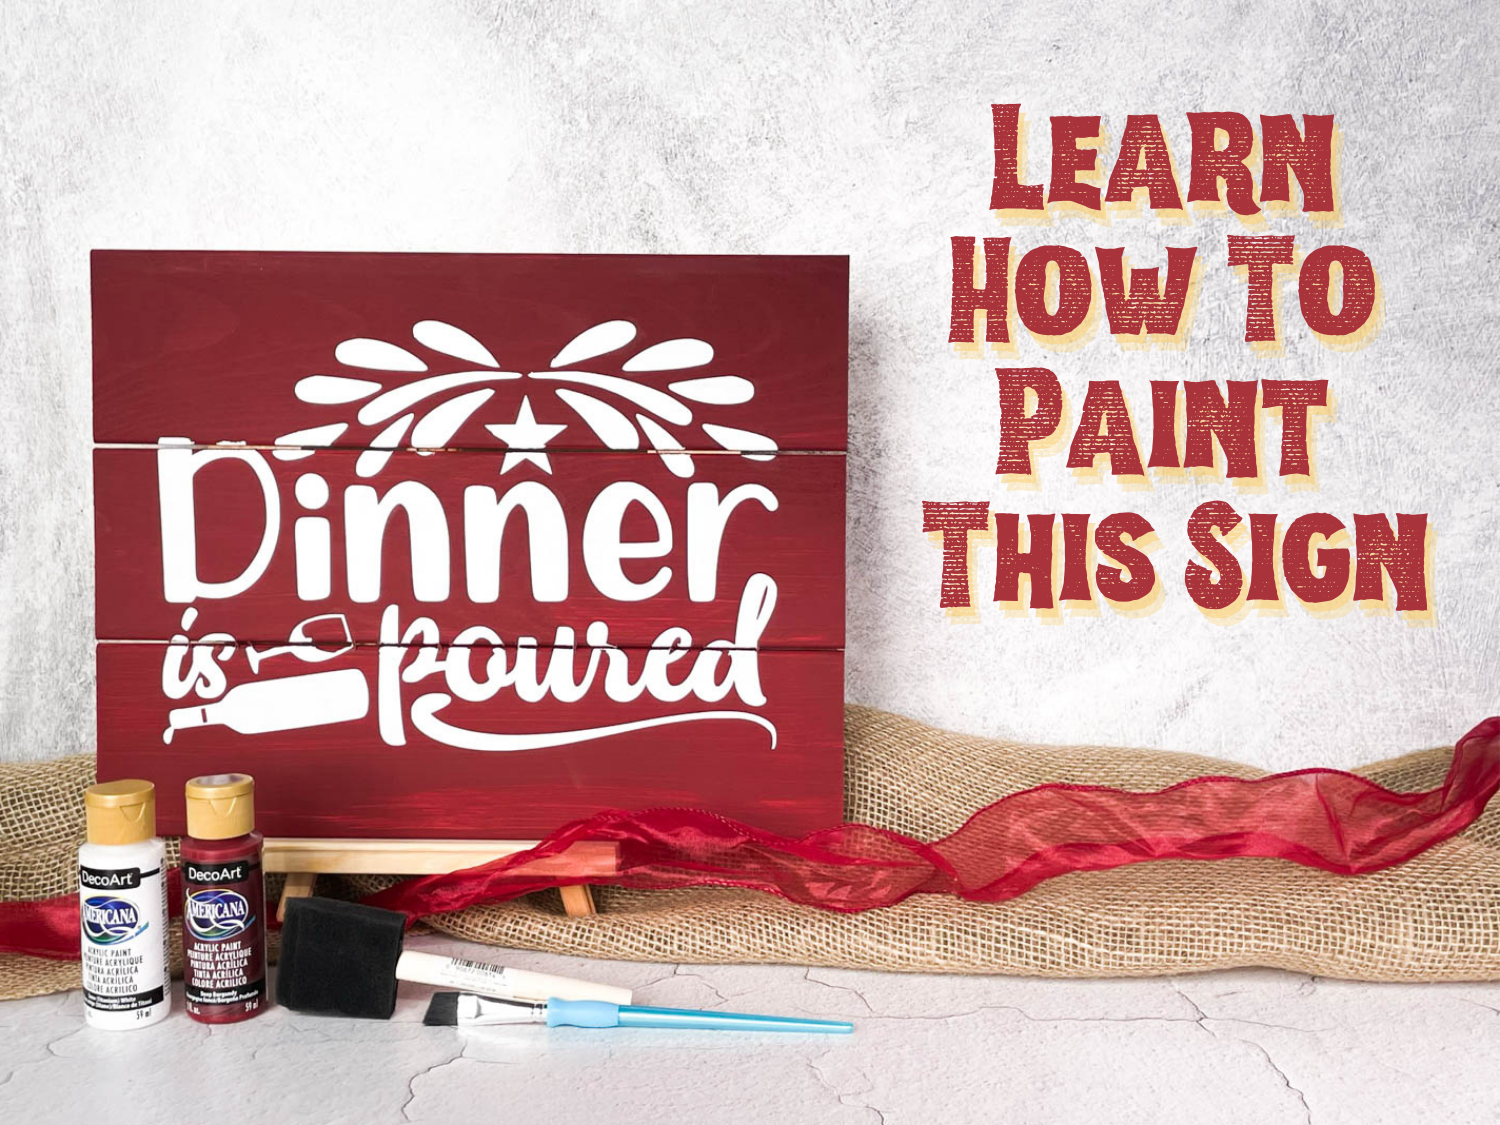
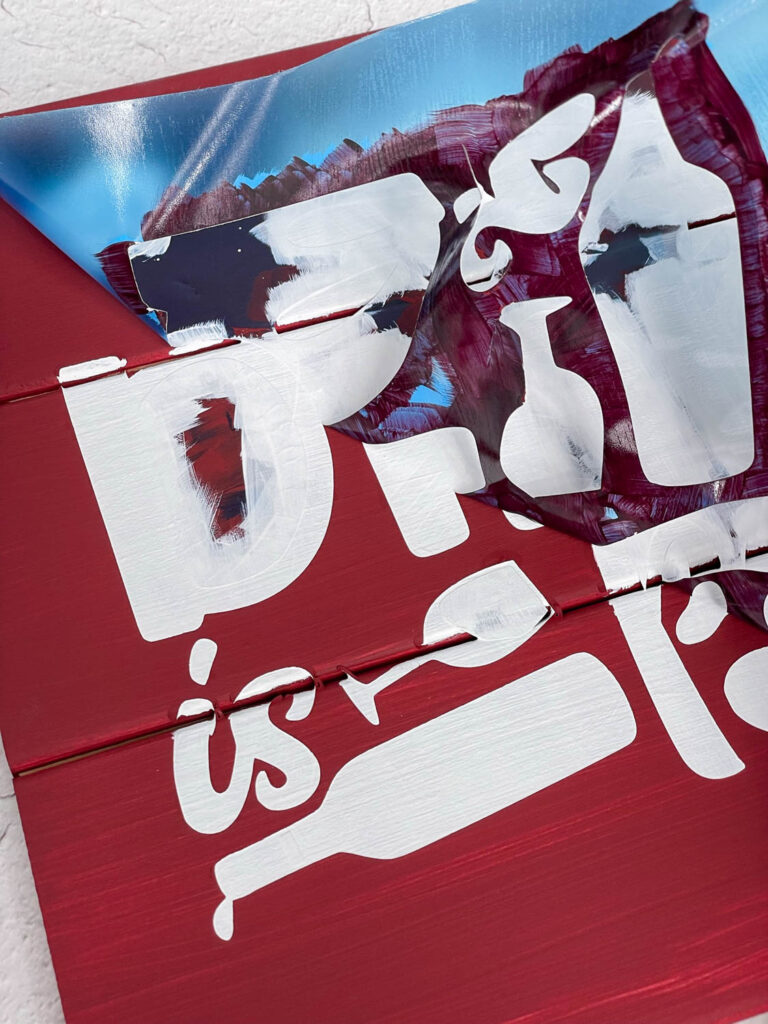
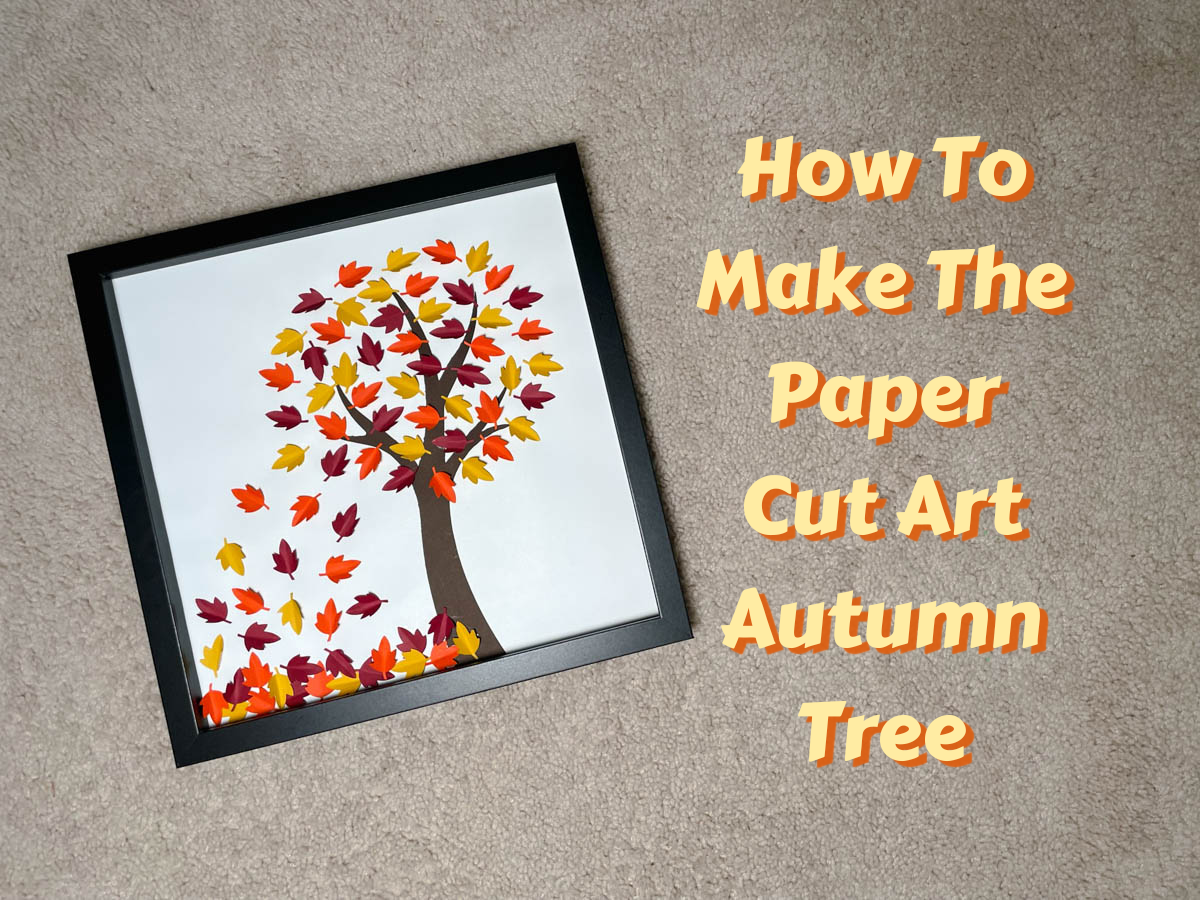
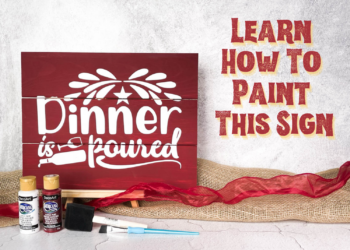
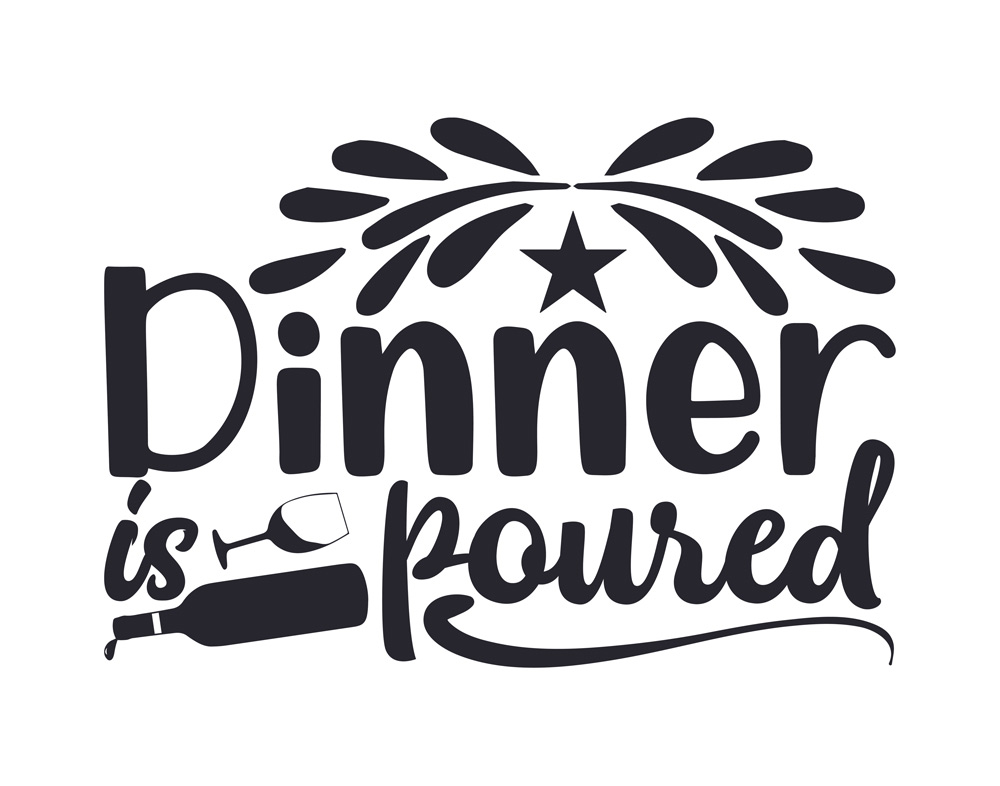
Learn how you can paint this “Dinner is Poured” sign for your kitchen. Perfect for all wine lovers!
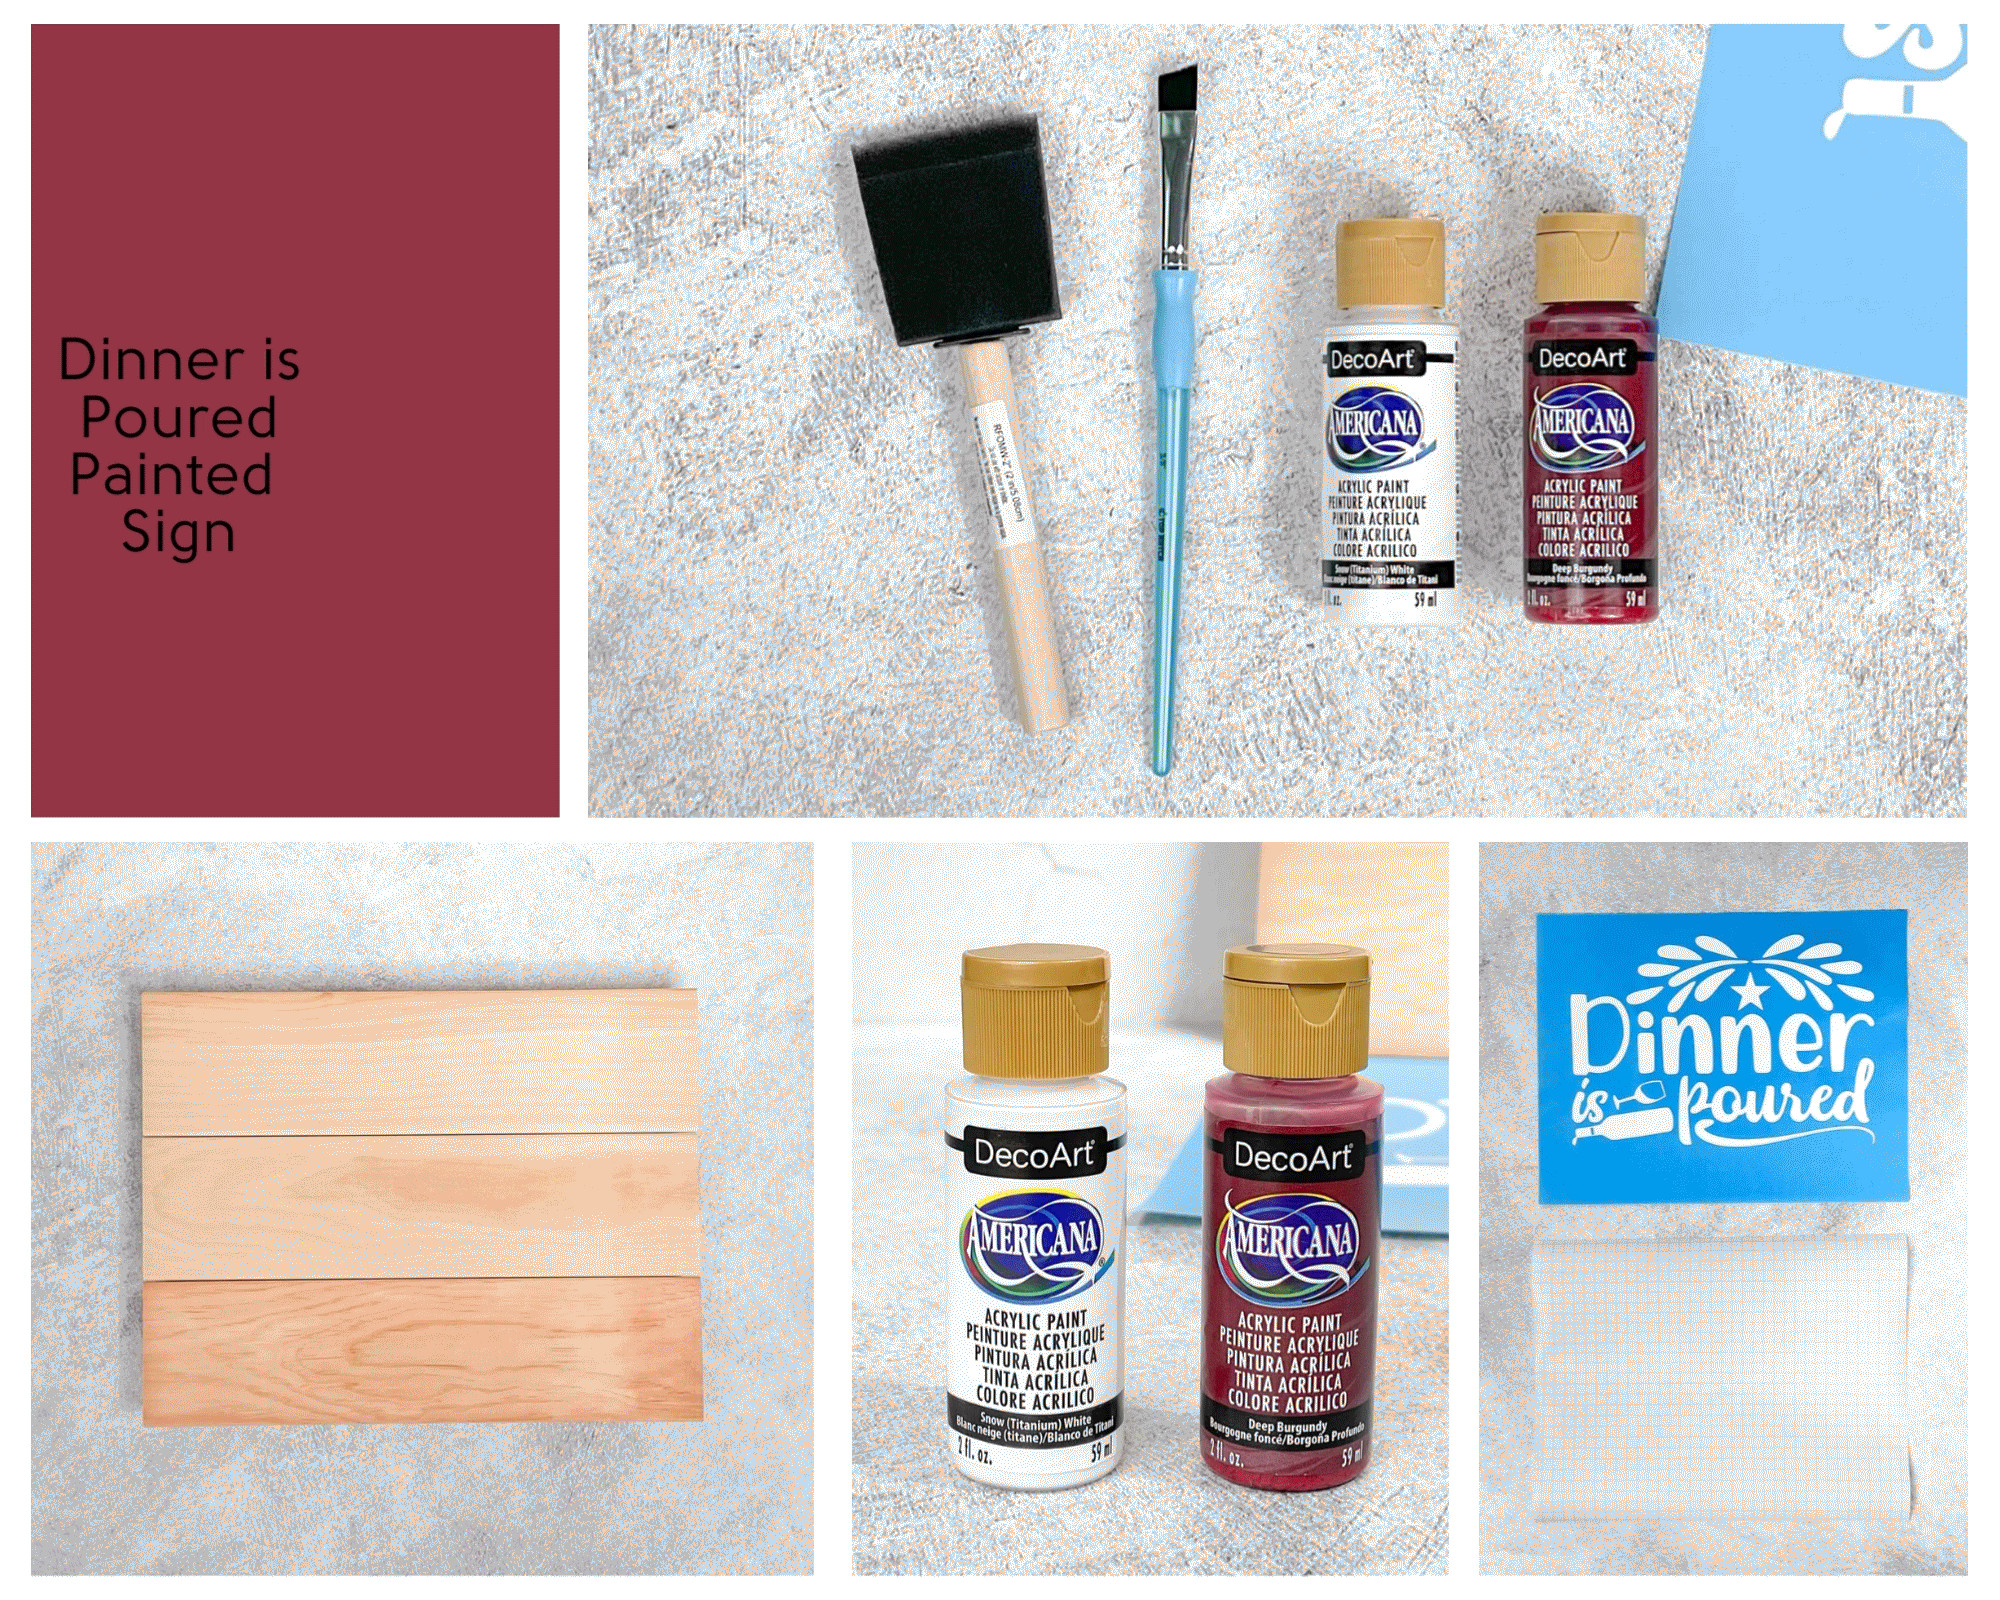
Materials
Here’s what you will need in order to make the Dinner is Poured sign:
- Wooden Board – mine was 14″ by 11″
- Acrylic Paint – Red and White.
- I used Deco Art Americana Deep Burgundy and Snow White.
- Paint Brush
- I used a foam brush for the background paint and an inexpensive acrylic brush for the detail.
- Vinyl Stencil and Transfer Tape
- The blue vinyl stencil and the transfer tape can be seen and ordered here.
- Electronic Cutting Machine
- The Silhouette Cameo 4 or the Circut Explore Air 3 are both perfect options.
- Cutting Mat
- This cutting mat is used for the electronic cutting machine.
- Weeding Tools (Optional)
- Use these tools to work with smaller pieces of vinyl.
Step 1: Paint Base
Paint the base of the wooden board with the red paint. Cover the board with two or three coats and paint the edges as well.
Let the paint dry completely for 12 to 24 hours. The paint must be dry in order to apply the vinyl stencil.
Step 2: Creating Your Stencil
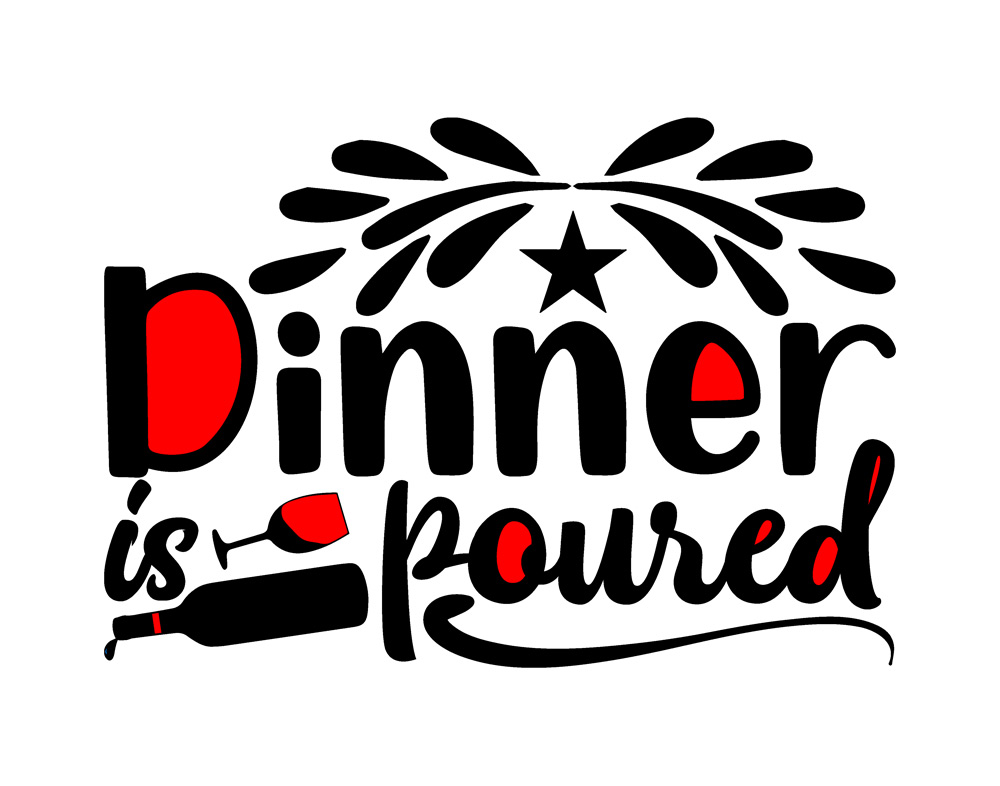
Download Pattern Template
Below is a link to download the Dinner is Poured pattern template. It is sized for a 14″ by 11″ board.
Upload and Print the Stencil
Once you’ve downloaded our pattern template, upload the template into the electronic cutting machine’s software. Adjust the size of the template to the size of your project’s board. Then have your cutting machine cut the design out!
Prep Stencil
Using a weeding tool, pair of tweezers, or your fingers, carefully peel and remove the cutouts. Weed out/remove the BLACK pieces in Diagram (A). Keep the 8 RED pieces in place. When complete the blue vinyl stencil will appear the same as Diagram (B).

Lay Clear Transfer Tape
Separate the transfer tape from the backing. Carefully lay the clear adhesive transfer tape on top of the blue vinyl stencil. Use a credit card or flat tool to squeeze out all the trapped air bubbles.
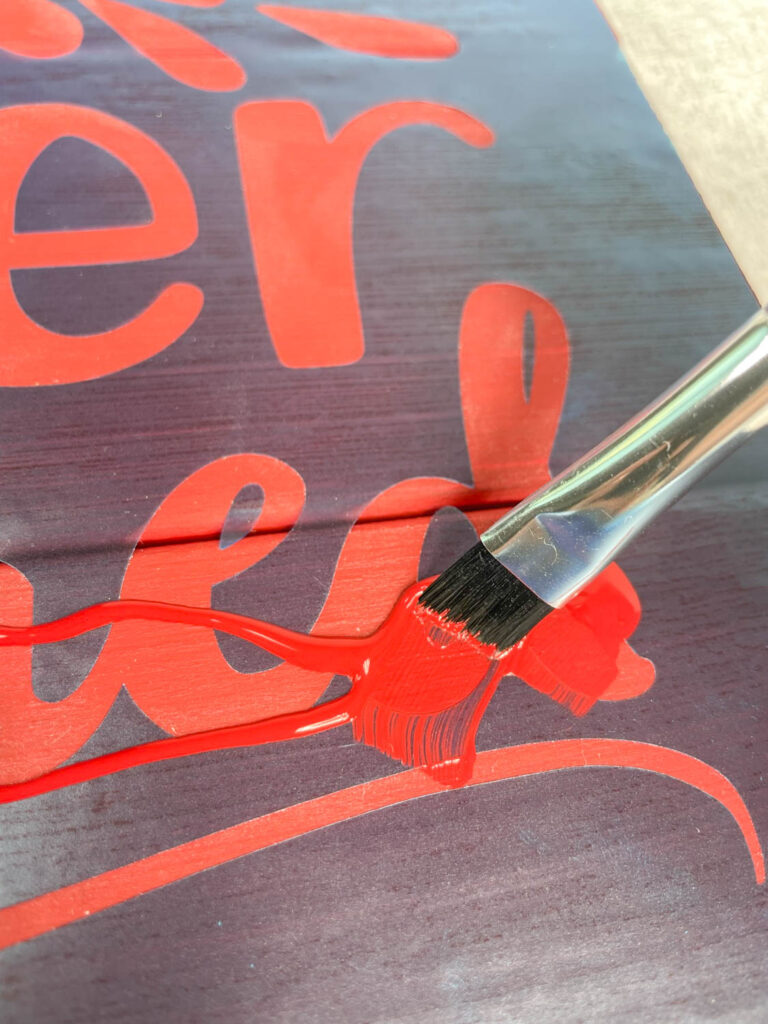
Step 3: Placing Stencil on Board
Carefully remove the blue vinyl stencil’s backing SLOWLY so that the stencil pieces do not come off the backing. All the blue stencil pieces must stay attached to the the transfer tape, not the backing.
When the vinyl stencil backing is removed, place the sticky side squarely down on the painted wooden board.
Using a credit card or flat edged tool, press and run the tool across the board to smooth out any air pockets and to seal the vinyl to the board.
Remove the clear transfer tape by SLOWLY lifting if off the blue vinyl stencil. The transfer tape should not lift off the blue stencil pieces.
When the transfer tape is removed, apply pressure to the blue vinyl stencil with your fingers or a tool. Seal any gaps along the edges of the design so that the paint does not seep through the sides of the stencil.
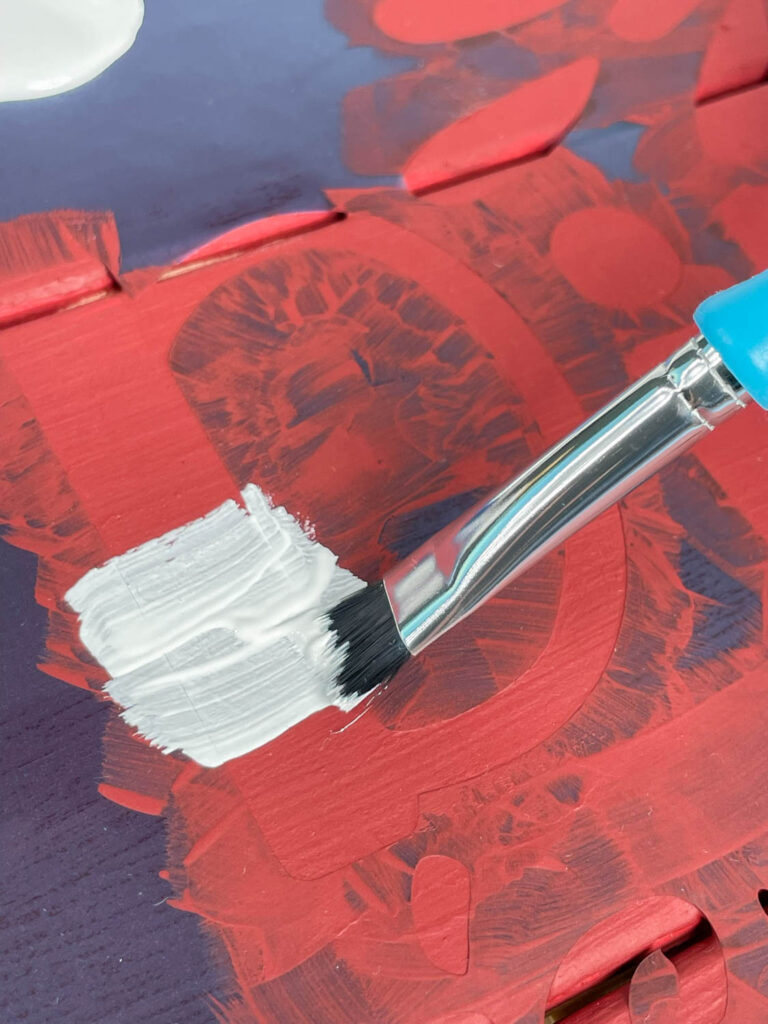
Step 4: Painting Stencil
Prevent Paint Bleeding
Click here to read about my paint bleeding trick in detail.
But to cover the topic quickly, brush a layer of the base paint (beige) over the newly laid vinyl stencil. Apply liberally and allow the base paint to bleed through.
This white layer of paint will act as a sealant, blocking any bleeding from the gray paint.
Wait about three hours for this layer of base paint to completely dry.
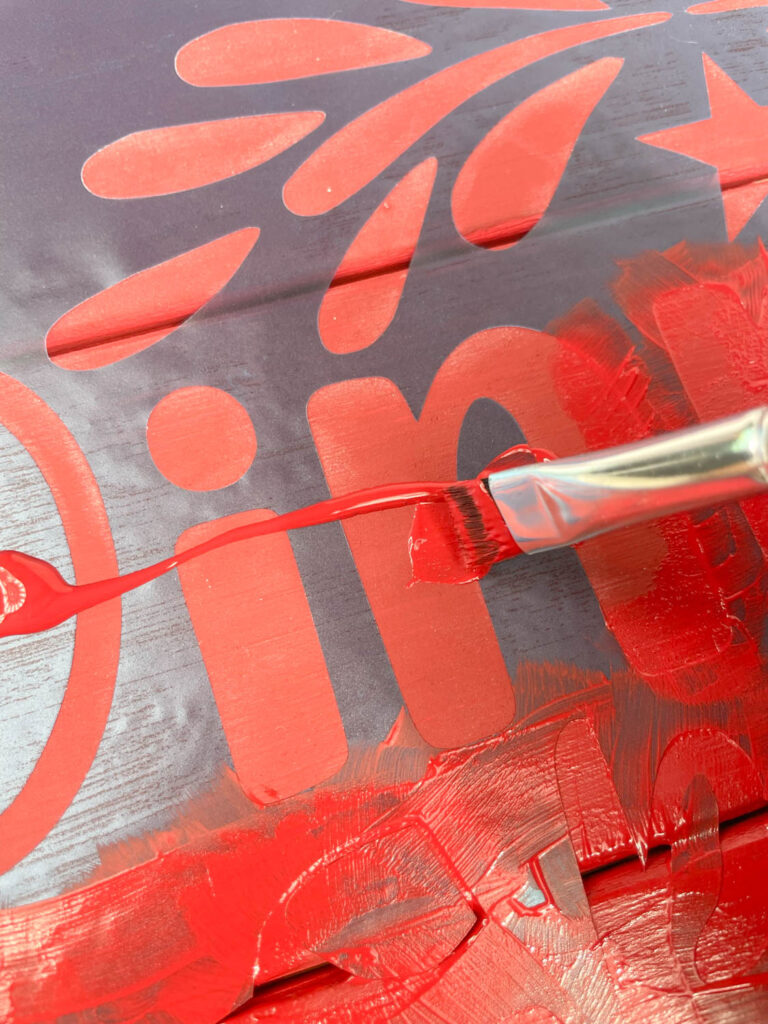
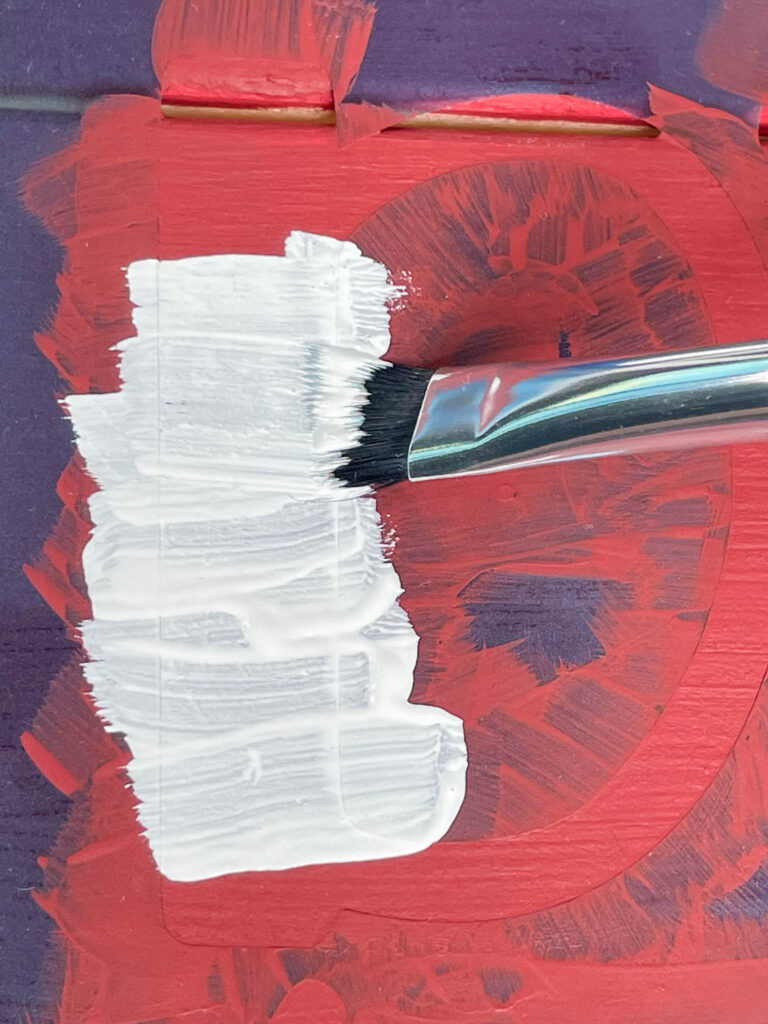
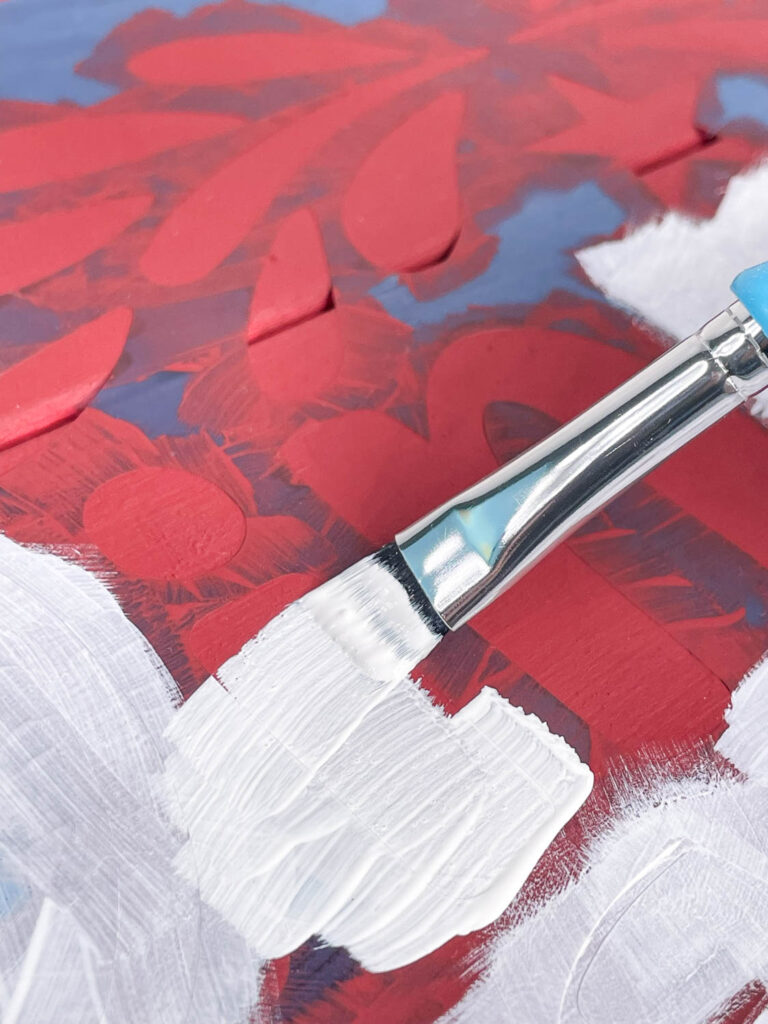
Painting The Design
Using the white paint, brush over the entire graphic. I recommend painting three coats of white.
Step 5: Lifting Stencil
When the painting is complete, lift and remove the stencil immediately. DO NOT let the paint dry, otherwise the paint will pull away from the wood.
Lift the blue vinyl carefully and slowly. Make sure the paint on the stencil does not get on the project.
When the stencil is removed from the board 8 small pieces of the vinyl stencil will remain. Use a weeding tool, tweezers, or pint to carefully remove the small remaining pieces.
Finished!
Let your masterpiece dry for a few hours.
Attach a hanging hook to the back of the board or lean your project on a shelf.
Congrats! Great job!


